My Lovely Followers

Showing posts with label Inkylicious. Show all posts

Thursday, 13 November 2025

Krafty Chicks challenge #794 - Christmas

Good morning lovely friends, I appreciate you stopping by and I hope you're all doing ok. It's time for a new challenge over at Krafty Chicks challenge and this week we are on Week 2; as always the theme is 'Christmas' and I am your hostess. Scarily Christmas is not that far away now so if you haven't started your cards yet this is the perfect opportunity to begin. Obviously if you have joined in with us since January then it's another card to add to the pile, which really takes the stress off. We hope you will come over and join in the fun with us.
I was looking through my stash and found this old metal stencil that I bought quite a while ago but haven't used yet so I thought why not show it some love.  I did mask off parts of the stencil so that I could blend them in different colours but boy was it fiddly; not a card I could mass produce lol!  I hope you like it.
Here is my card:
A closer look at the details:
Plus I decorated the inside:
I began by cutting a white panel 4 1/2 x 5 1/2 (which I cut down slightly later) and using green and red ink pads blended through the stencil, masking off as I went along.  As I said it was quite a fiddly and tedious process but I think it was worth it as I love the contrast of the green against the red. Once the blending was finished I stamped the cabin image into the bauble with black ink.  I then cut down the panel to 4" x 5 1/4" and added some scrap white card behind it for stability and dimension.  I decided to mat it onto a red layer cut to 4 1/4" x 5 1/2" although I could have just cut a red card base but I was in the zone and had already cut my card base from white.  I added the panel onto the card base with double sided tape.  I added some white gelly roll pen 'snow' but didn't feel it was bright enough so after a bit of searching found my white posca pen and added some 'snow' with that too.  I stamped and die cut the Merry word and used a sentiment strip die to cut out the Christmas word.  I added the merry with liquid glue and the Christmas was added overlapping with foam squares.  A final finishing touch was some snowflake embellishments which I added with liquid glue.  For the inside I cut a panel 3 3/4" x 5" and used the stencil to just add some interest to the bottom.  I matted the panel onto a red card layer with double sided tape and stamped the sentiment in the centre with black ink.  The panel was then adhered to the card base with double sided tape.  A very traditional Christmas card but I really like it. 

I would like to enter my card into the following challenges:

The 12 Months of Christmas Link Up challenge - anything Christmas goes optional twist sleigh
Allsorts challenge - Christmas cards
Aud Sentiments challenge - glitter and/or Christmas + sentiment
Colourful Options challenge - red optional mood board
Craft Rocket challenge - Christmas/winter
Creative Inspirations challenge - wrapped up in winter
Creative Knockouts challenge - time to be merry
Daisy Chain challenge - Christmas/winter
Farm Quest Country Christmas challenge - anything goes country Christmas 
Merry Little Christmas challenge - anything Christmas goes
Stencil Fun challenge - anything stencil goes optional theme use gold
The Paper Funday challenge - ATG optional twist merry & bright
Tic Tac Toe challenge - ornament, red, Christmas sentiment
Try It On Tuesday challenge - get ready for Christmas 
Unicorn challenge - Christmas/winter
We Love Stamping challenge - anything Christmas

I hope you will be able to join us for our 'Christmas' challenge and I cannot wait to see your creations in our linky.  Please leave some love for my fellow chicks - Leanne, Diane and Lori. 

Thank you so much for stopping by; I appreciate your lovely comments.

Love and hugs,
card supplies:
Sweet Poppy - Christmas snowflake bauble stencil - ? retired
Kristina Werner with Concord & 9th - joyful & merry stamps & coordinating dies
Gina K Designs - ink pads - cherry red, red hot, Christmas pine
Versafine Clair - nocturne ink pad
Trinity Stamps - vanilla sugar snowflakes embellishment mix
red card from stash

*I now have an Affiliate Link for the Gina K Designs store. If you are considering making a purchase I would appreciate you using my link as it will earn me a small commission at no extra cost to you. 
Thank you x

Thursday, 6 June 2024

Krafty Chicks challenge #719 - Stamps

Good morning friends; it's Thursday so that means it's time for a new challenge over at Krafty Chicks challenge.  As it's the start of the month we are back to Week 1 which means our theme this week is 'Stamps', so we would like to see a stamp/digi on your project. 
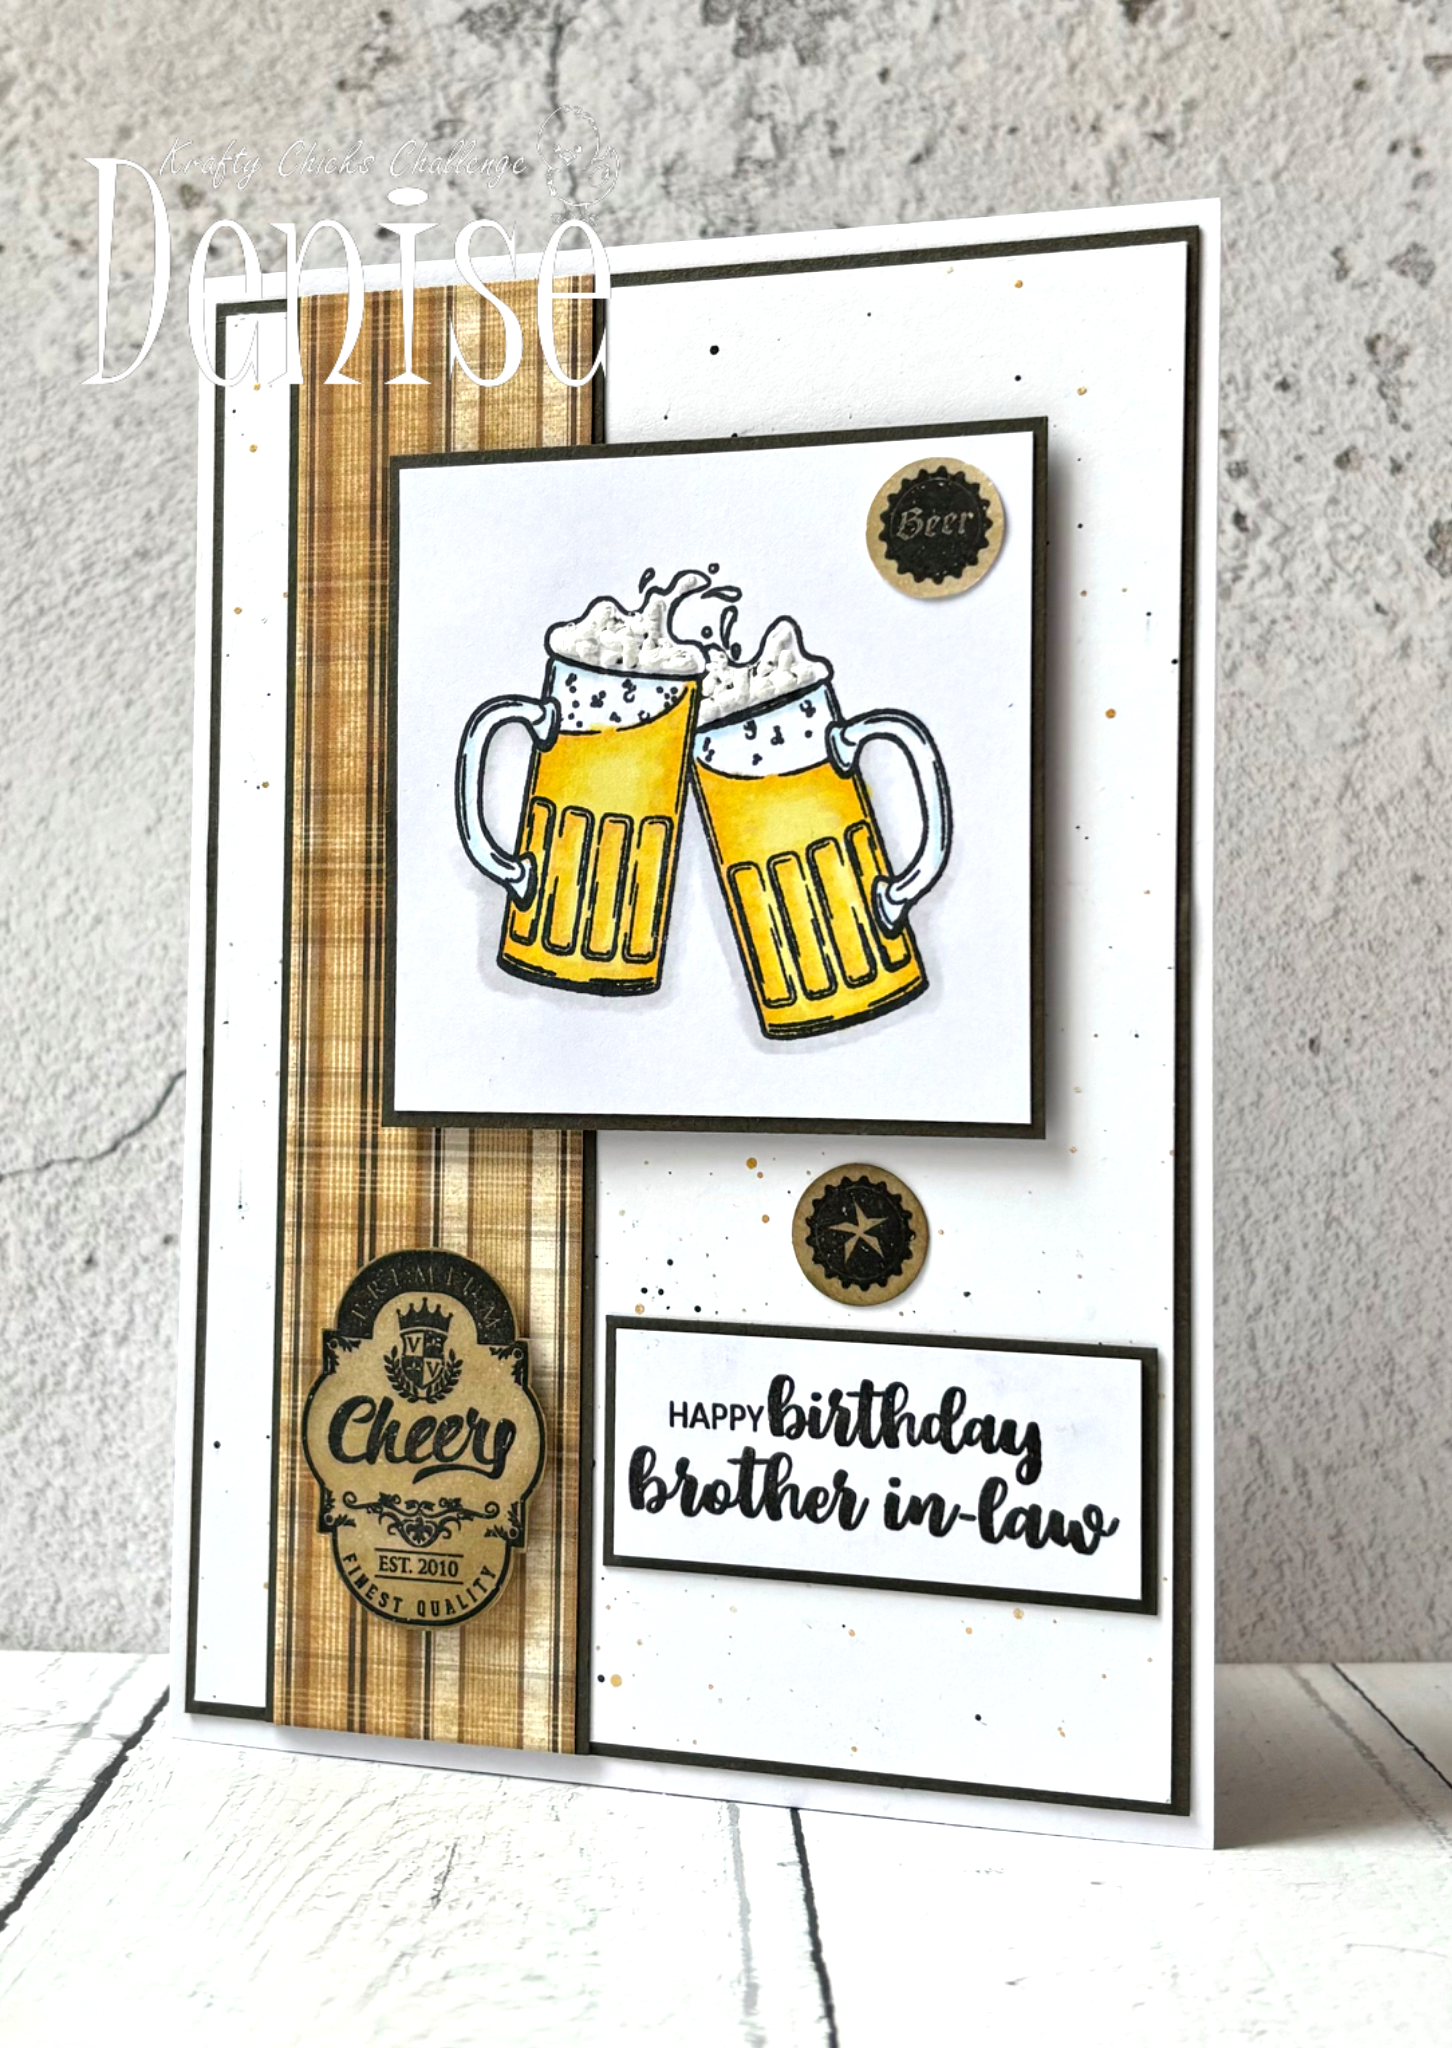
It was my brother-in-law's birthday recently and today I'm sharing the card I made for him.  He took his cards away on holiday with him so didn't fuss too much, although most men prefer this anyway I find.  
Here is my card:
A close up of the image:
I decorated the inside:
I began by stamping the image onto alcohol marker friendly card and coloured it with my Promarkers.  I also added some puffy stuff to make the foam look dimensional.  I cut it into a square and added a brown mat behind.  I had already created the background for a different project but hadn't used it.  It was simply a white panel with some black and gold splatter over it.  I again matted it onto a brown panel and adhered it to my card base with double sided tape.  I wanted to add some interest so took a strip of patterned paper, added a brown mat panel and adhered it to my background along the left side of the card.  I attached the image panel over top with foam squares.  I stamped the sentiment in black ink and cut it into a rectangle before adding a brown mat behind.  The was added to the card with double sided tape.  In the same stamp set as the beer glasses were some label type images and smaller bottle top style stamps.  I stamped them onto white card, inked them with a brown ink pad.  I fussy cut the label and used a small circle punch to cut out the smaller ones.  I added the label with foam squares and the circles with liquid glue.  For the inside I cut a white panel, simply added a strip of the patterned paper to the very bottom and added a strip of brown card above.  I adhered this onto a brown mat panel and stamped the sentiment in the centre with black ink.  I added one of the small punched circles to the bottom right corner.  The whole panel was then adhered to my card base with double sided tape.  The finished card is 5" x 7".  

I would like to enter my card into the following challenges:

Allsorts challenge - lots of layers
Classic Design challenge - ATG optional twist masculine
CRAFT challenge - masculine
Make My Monday challenge - B is for ...... birthday, beer, brother-in-law, brown

I hope you will be able to join us for our 'stamps' challenge and I cannot wait to see your creations in our linky.  Please leave some love for my fellow chicks - Leanne, Diane and Lori and also our guest designer Rachelle, who is with us for another month.  

Thanks for stopping by. 

Love and hugs, 
Card ingredients:
Apple Blossom - time for a beer stamp set - no longer available 
Clearly Besotted - happy birthday all - retired
Clearly Besotted Stamps - mini calligraphy - retired 
Woodware - tiny circle punch
DCWV - the natural stack 8"x8" cardstock pad - no longer available
Gina K Designs - charcoal brown card
Gina K Designs - warm cocoa ink pad
Versafine - onyx black ink pad
Promarkers
Inkylicious - fluffy puffy stuff

Tuesday, 9 April 2024

Birthday card for Mother

Hello friends; I hope you've had a great start to your week.  The weather here in South Wales has been awful, so much rain and really windy but we've been lucky compared to some areas of the country, although it does seem that we've had rain for 10 years lol!  

It was my lovely mother's birthday last week so I thought I would share the card I made for her.  I went for a shabby chic vibe with muted colours.  I hope you like it.  
Here is my card:
a closer look at the images:
I decorated the inside:
I began by stamping the images in a soft beige ink and coloured them in muted colours of Promarkers.  I used the matching dies to cut them out.  I cut a piece of white card 4 3/4" x 6 3/4" and used an embossing folder to add some texture.  I matted the white panel onto a slightly larger pink panel with double sided tape.  I die cut a postage stamp panel and cut it up to make individual postage stamps.  I used my Promarkers to colour the edges, stamped a script background stamp over the postage stamps and also used a distressed background stamp to add some 'franking' marks to my postage stamps.  I also stamped some postage value and postage word stamps in black ink.  I added my images with foam squares and also added the postage stamps to my panel with foam squares.  I die cut a stitched strip banner and stamped my greeting in black ink; this was also added to the panel with foam squares (lots of dimension as I knew I would be hand delivering my card).  I adhered the panel to my card base with double sided tape and finished off with some gold pearls.  For the inside I added the same script background just around the edges of my panel and stamped my sentiment in the centre with black ink (I didn't realise it was off centre until now lol!).  As I had a few images left over I added them in a cluster in the bottom left corner with liquid glue.  I again matted the white panel onto pink card and adhered this to the card base with double sided tape.  I don't normally do shabby chic/vintage style cards but I'm happy with the finished result and most importantly my mother loved it.  The finished card is 5" x 7".

I would like to enter my card into the following challenges:

Addicted to Stamps & More challenge - die cuts and/or stencils
A Place to Start challenge - ATG optional twist add one or more flowers
Beautiful Blossoms challenge - anything floral goes optional mood board
Can You Handle the Pressure challenge - must use an embossing folder optional twist - birds
My Time to Craft challenge - butterflies and/or dragonflies
Sweet Stampin' challenge - birthday girls
Triple B challenge - must include at least one bird, butterfly or blooms
Unicorn challenge - use a die

I hope you enjoy the rest of your day.  I am so grateful for all the visits and comments on my blog.  I'll be back again tomorrow so hopefully you will be able to pop back again.  

Love and hugs, 

Card ingredients:
Gina K Designs - vintage summer stamp & die set
Gina K Designs - Master Layouts 14 
Gina K Designs - spring friends stamp set (for postage values and words)
Gina K Designs - lovely lace stamp set (for main sentiment)
Gina K Designs - ink pad - sandy beach
Promarkers
Honey Bee Stamps - Inside: birthday sentiments
MFT - romantic script background stamp
Inkylicious - worn paint background stamp (for 'franking' marks)
Versafine - onyx black ink pad
pink card from stash