My Lovely Followers

Tuesday 18 August 2020

50th birthday card

A friend in work recently celebrated her 50th birthday so I made her a happy and bright card to celebrate.  I decided to make a cocktail themed card as she was going away with friends so it seemed very apt.

Here is my card:


I began by stamping the fantastic glass images and die cut them out with the matching dies.  The umbrella, stirrer and orange were also separate images but again had matching dies.  I added some Nuvo aqua shimmer pen to the drinks and they really shine in real life.  I added the die cut drinks to a white panel and stamped the 50 cheers alongside.  This was then added to a piece of patterned paper and attached to my card base.  I stamped a secondary sentiment below the white panel.  I didn't think the card needed any embellishments so left it as it was.  

I am going to enter my card into the following challenges:

Cute Card Thursday - bright colours
Sweet Stampin challenge - favourite colour combo (I love soft pastel colours)
Crafty Hazelnut's Paper challenge - August 2020 (use patterned paper)
Allsorts challenge - summer fun

I hope you've had a good start to the week and the weather has improved.  It's showery here but still very humid so not an ideal combination!  

Enjoy the rest of your week and take care.


Card ingredients:
Clearly Besotted Stamps - raise a glass (I have the older version)
Clearly Besotted Stamps - basic numbers
MFT - beary special birthday (for the sentiment)
Versafine onyx black ink
Papermania spots & stripes - pastels 8x8 pad

Thursday 13 August 2020

MFT summer school 2020 day 5

Hi again friends.  I've managed to play catch-up and I'm finally graduating from MFT summer school 2020 with my contribution to Day 5.  I've never participated before but I've had lots of fun making my cards this week and it has been great to challenge myself using techniques I've not tried before.  


Here is my final card for the MFT summer school and today's theme is all about white space. 

"The idea of white space doesn’t refer to a primarily white card (though often, as is the case with today’s project, this is true) but rather, the idea of leaving a significant portion of your design open, free from embellishment, allowing your focal point to truly shine".

Here is my card for today:


close up of my card:


I stamped the adorable images using Memento tuxedo black ink onto a white card panel.  I fussy cut some post it notes and masked off the images before blending squeezed lemonade distress oxide ink over the panel.  I removed the masks and then coloured my images with Promarkers.  The colour choices were inspired by this week's MFT colour challenge 147 and the layout was inspired by this week's MFT sketch challenge 502.  The sentiment was stamped with Hero Arts soft brown shadow ink and the only thing I added was some Nuvo shimmer pen to the balloon.  I did find it quite hard to leave it without embellishments but I think it turned out super cute.  

I hope you've enjoyed seeing my summer school projects and appreciate you stopping by.   

I am entering my card into the following challenges: 


MFT sketch challenge 502 (which I rotated):


I hope the storms haven't been too bad where you are; we had some thunder and lightening here last night and a few brisk rain showers but it really hasn't been as bad as some parts of the country.  My thoughts go out to everyone struggling with power outages and flood damage and especially the people who lost their lives in the train derailment in Scotland; so tragic.  

Take care and stay safe.
 

Card ingredients:
Squeezed lemonade distress oxide ink

Wednesday 12 August 2020

MFT summer school - day 4

Hi friends, I bet you are getting fed up of seeing posts from me this week - it's all or nothing over here isn't it lol 😂

Here is the next card for the MFT summer school 2020 and day 4 is all about ombre.  

"Ombré is a time-tested technique that still somehow manages to feel both modern and innovative. There are a number of ways to add an ombré effect to your cards — from simple die-cut shapes and sentiments to full panels. Opt for a clean and simple single hue or fade from one tone into another for more dramatic appeal".

I choose to opt for a single hue background from dark green to light green.  Here is my card:


close up of my card:


I began by stamping the MFT Fine Chevron background stamp using 3 mini ink cubes in greens, starting with my lightest at the bottom and working up to the darkest.  I then stamped the super cute images from the MFT Let's Stick Together stamp set and coloured them with Promarkers.  Unfortunately I don't have the matching dies for this set so fussy cut them out.  I stamped a matching sentiment from the set in Versafine onyx black ink and cut it out with my Tim Holtz guillotine.  I decided that I didn't want to cover the background too much so die cut a vellum circle so that my images had a focal point to sit on and I added the images with liquid glue onto this circle.  This was then added onto the background with liquid glue.  I added the ombre background panel onto a green card base with foam tape and also added the sentiment strip with foam tape.  The finishing touch was a few gorgeous crystal circles and some white highlights on my images using a white gel pen. 

I'm really happy with this card and although I'm not a big green fan I think it looks super cute.  

Just one more day to go so I'll try and get my card done tonight ready to share with you tomorrow.  

Enjoy the rest of your evening and take care.  

Lots of love,


Card ingredients:
MFT - Fine chevron background stamp
Versafine onyx black ink pad
Promarkers
Stampin' Up cardstock vellum 
Stampin' Up green card from Bold Brights pack
Little Things from Lucy's Cards - Sprinkles - crystal circles

Tuesday 11 August 2020

MFT summer school day 3

Happy Tuesday friends.  I'm back to share my card for Day 3 of MFT's summer school 2020.  Day 3 is all about symmetry.  

"Symmetry refers to positioning your elements mirrored across an imaginary line that divides your project into even segments. It’s a great method for achieving balance in your design and is a reliable means of laying out your card elements when you don’t have a lot of planning time to spare".

Here is my card:


Close up of my card

I used the fun MFT Make a Wish stamp set and stamped the images (which come in 3 separate parts, candle, flame and hearts) directly onto my white panel with a variety of mini dye ink cubes.  I added the white panel onto a piece of MFT Thick & Thin 6x6 paper with foam tape and also added the sentiment across the middle of the image with foam tape.  This panel was then added onto my white card base.  I finished off with a few glittery gumdrops. 

I hope you like my fun birthday card.  I really like the bright colours and the images are so versatile for both male and female cards if you just switch up the colour scheme.  

I'll hopefully be back soon with day 4 and 5 if I can catch up in time 😀

Thanks for stopping by to my little corner of blogland.  Have a great evening and take care.


Card ingredients:
MFT - Thick & Thin 6x6 paper pad
Versafine Onyx black ink for sentiment
Mini dye ink cubes for the images

Monday 10 August 2020

MFT summer school - day 2

Here I am again, with Day 2 of MFT's summer school 2020.  Day 2 is all about rainbows.  

"When choosing a color scheme, particularly for a bright & happy occasion, you simply cannot go wrong with a rainbow. There is something so comforting and cheer-inducing about that ROYGBIV arrangement — whether you opt for traditionally vivid hues or tone things down with pastels, a rainbow is never a bad choice".

Here is my rainbow card:


close up of my card:


This card did not turn out as I had planned but I still think it's a really pretty card.  I used the MFT rectangle trio stencil to ink blend my rainbow and then used my paper trimmer to cut out each colour.  I added these to piece of white card, trimmed it down and then attached this to my card panel with foam tape.  I stamped the balloon image over the ink blended panel and then stamped for a second time and fussy cut just the balloons (without the strings) and ink blended with the same colours as my background.  I stamped the sentiment with versafine onyx black ink and used liquid glue to add to my panel.  I finished off with a rainbow of crystals.  

I need to get cracking now and try to finish the remaining 3 days of summer school 😊

Thanks for stopping by and see you soon.

Take care and stay safe. 


Card ingredients:
MFT - beary special birthday stamp set (for the balloon image)
Distress oxide inks
MFT - I heart celebrating stamp set (for the sentiment)
Little Things from Lucy's Cards - crystal collection over the rainbow
Versafine onyx black ink
Tonic Studios - Nuvo deluxe glue

MFT summer school - day 1

Hello again friends.  I can't believe it's been a week since my last post.  I had very good intentions of sharing more cards last week but to be honest the heatwave had knocked me for six.  I'm a woman of a certain age now and I don't need any extra heat - I'm already a walking radiator at times lol!  

My Favourite Things is currently running it's Summer School and although I had hoped to complete all 5 days I have only managed 2 so far, although there are still a few days left so I will try and get them all done.  If you want to check out all the details pop over to their blog.  Day 1 was all about the 'Visual Triangle.  The idea of a visual triangle is that you use a trio of common elements or similar colors, placed as if at the points of a triangle, to direct the eyes around your card design.

Here is my entry for Day 1:


close up of the card:


I used super cute images from MFT Farm Friends and coloured them with Promarkers and die cut them with the coordinating dies.  I used 2 stencils to create the background with distress oxide inks - the MFT mini cloud stencil and the MFT drifts and hills stencil.  I die cut a frame from white card using the largest MFT rectangle frame and stamped a sentiment from the stamp set.  Finally I drew some 'birds' with a black fine liner pen and added some sequins from Studio Katia for a bit of sparkle.   

I hope you like this fun, cute card.  I'll be back later with my card for Day 2 - rainbow.  

Have fun and stay safe.


Card ingredients:
MFT - farm friends stamp & die set
MFT - rectangle frame die set
Various Promarkers
Letraset black fine liner pen 0.3
Distress Oxide inks in tumbled glass & mowed lawn

Monday 3 August 2020

A card for Squirrel!

Happy Monday friends.  I can't believe another week has whizzed by and we are now into August!  I hope you all had a fab week last week and managed to enjoy the sunshine.  I'm back to share a card I recently sent to a crafty friend.


close up of the cute image


inside of the card


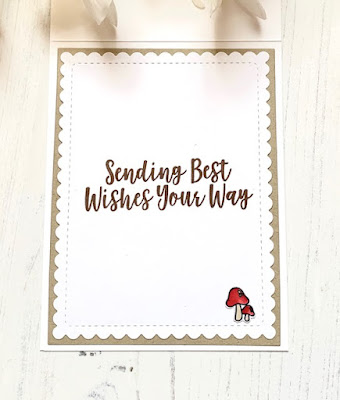
I coloured the super cute images with Promarkers and fussy cut them out (as I sadly don't have the matching dies).  I altered the sentiment as the one in the set says squirrel! oh nuts, I forgot your birthday.  As my crafty friend is known as Squirrel I wanted to change it.  I stamped the 'Squirrel word and then grabbed my 'call the shots' stamp set and just stamped the GO (from the you always take such GOod care of me) and added the 'nuts', I then stamped the 'it's your birthday' from the 'birthday chicks' stamp set.  I added the images and sentiment to a white scalloped panel cut with the sunshine layers die before adhering this to a kraft card panel.  I didn't add any embellishments as I thought it looked cute the way it was.  I had one little mushroom image left so I added this to the inside of my card.  

I am going to enter this card into the following challenges:

Simon Says Stamp Monday challenge - happy birthday (it's their 10th year!)
Krafty Chicks challenge - anything goes

I hope you have a wonderful week.  I will be back soon with another card.

Take care and hugs,


Card ingredients:
MFT Birthday chicks (for the sentiment only)
MFT call the shots (again for the sentiment)
MFT you give me butterflies (sentiment on inside)
Promarkers