My Lovely Followers

Showing posts with label W Plus 9. Show all posts

Tuesday, 21 April 2026

ATC Scrap Makes IG Hop - April 26

Hello friends, I hope you're doing great and you've had a great start to your week. I'm sharing my creations for this month's ATC Scrap Makes IG Hop. We challenge you to use leftover die cuts, sentiments and card stock to create Artist Trading Cards (ATC's). You can send them in happy mail, save them on a ring to highlight your favorite creations, swap them with friends or add sweet notes to a lunchbox. Join us if you like; the only rules are to use scraps and create cards that are 2.5” x 3.5” in size. We share our little snippets of happiness on the third Tuesday of the month.
This month I am continuing my alphabet series of ATC's with D, E & F.  I think it will be fun each month finding images/dies for each letter (although I did struggle with F this month and breathed a sigh of relief when I found the fairy stamp lol!).  I'm excited to see them all at the end and I hope you are going to stick around to see them all too.  I used mostly older, retired products but I still love them so why not use them. I hope you like them.
Here are my three ATC's:
Here's a closer look at 'D':
Here's 'E':
and here's 'F':
The backs are simply decorated with the ATC info stamp and some blending:
Once again I used my leftover ink blending scrap paper for my backgrounds as they turn out really interesting and not something I would create myself.  I did add some stamping and ink blending over them to tie them into the image a little more and I think they turned out great.  I stamped the dog, elephant and fairy images and coloured them with Promarkers.  I had the dies for the dog and elephant but had to fussy cut the fairy.  I die cut the three frames (the same die set that I used last month) from gold mirror card and adhered them to the backgrounds with liquid glue.  I die cut the letters 3 times in each colour and stacked them with liquid glue; these were then adhered to the top left corner with liquid glue.  I added each of the images with foam squares.  For the backs of the ATC's I simply ink blended the matching colours around the edges and stamped one the ATC info stamps (that I won a few months ago) in black ink.

I would like to enter my ATC's into the following challenges:

Alphabet challenge - z is for zoology (any animal)
Classic Design challenge - ATG optional twist furry friends
Crafty Animals challenge - ATG must include an animal
Critter Crazy challenge - ATG with a featured critter
Dream Valley challenge - things with wings (my fairy ATC)
Paper Rocks Scissors challenge - use paper and/or scissors (I fussy cut the fairy)
Tag-along (& ATC's) challenge - blossoms, butterflies & birds or ATG (I went ATG this time)
Try It On Tuesday challenge - make your own background 

I hope you will pop over to Instagram and check out the hop; please use the hashtag #ATCscrapmakes2026 or #ATCscrapmakesApril26 to see all the gorgeous creations and also if you want to participate we will be able to find you.

I really appreciate you stopping by today.

Love and hugs,

ATC supplies:
MFT - puppy kisses stamp & die (for dog)
MFT - distressed patterns stamp
MFT - little letters die set
MFT - new best friend stamp (for paw stamp)
W Plus 9 - unforgettable stamp & die (for elephant)
Tonic Studios - I love you fairy much stamp (for fairy)
ATC silicone stamp won in a challenge
Limetree Craft - 280gsm silky smooth white card (not available but other options are here and here)
Versafine Clair - nocturne ink pad
Promarkers
Tsukineko - silver encore ultimate metallic ink pad (to stamp the stars)
coloured card and mirror card from scraps bin
*Gina K Designs - ink pads - dark chocolate, warm cocoa, slate, stormy sky, dark carnation

*I now have an Affiliate Link for the Gina K Designs store. If you are considering making a purchase I would appreciate you using my link as it will earn me a small commission at no extra cost to you. 
Thank you x

Sunday, 6 July 2025

Dragonfly Dreams challenge - guest designer

Good morning and happy Sunday lovely friends. I hope you are all doing ok and finding lots of time to get crafty.  Well the weather has taken a turn for the worse and we had quite a bit of rain yesterday, although it was still really humid.  Let's hope it's only a blip and the sun will return soon.  
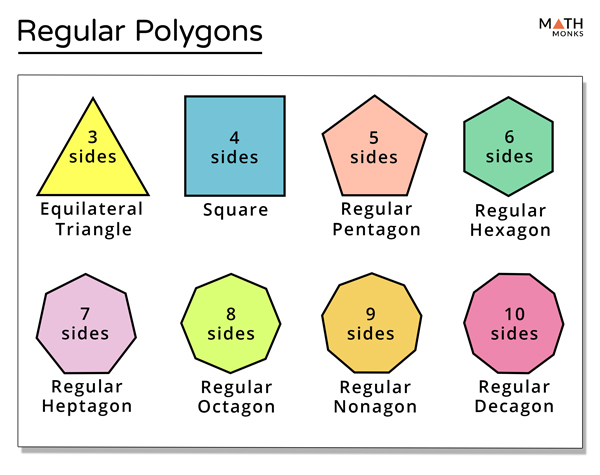
I am delighted to be a guest designer over at Dragonfly Dreams challenge this month and they have a fantastic theme of 'use polygons'.  It's such a unique challenge but don't be put off by the name as it's easier than it sounds.  So many shapes are polygons so you won't have to think too hard to take part. 

For my card I decided to go with a diamond shape as I wanted to use a Uniko stencil which was a recent purchase.  It is such a clever stencil and the results are gorgeous.  I hope you like it.
Here is my card:
A closer look at the background:
Plus I decorated the inside:
I began by cutting a white panel 5 1/2" square as I wanted some extra for the inside of my card.  I used a pink and orange colour combo, which is one of my faves, along with kraft card as my neutral.  I grabbed the Uniko stencil and firstly inked the pink part, once that is complete you clean the stencil and then flip it over so that you can ink the orange part.  It's such a clever stencil and even a messy crafter like me was impressed at how well it lines up and looks so crisp.  I cut a scalloped panel from the kraft card and then cut down my stencilled panel to fit inside and also used my corner rounder to match the stitching on the kraft panel.  I adhered them together with liquid glue.  I decided to make my sentiment panel a diamond shape also as I didn't think it would look right with a square or circle so hand cut the white diamond and also a mat layer from vellum.  I stamped the sentiment in black ink and then layered the two diamonds with foam squares.  It was also added to the panel with foam squares for lots of dimension.  I finished off with some black pearls.  I added some scrap white card behind the panel for some thin dimension and stability and then added it to my card base with double sided tape.  For the inside I cut another kraft panel and layered a white panel on top with liquid glue.  I fussy cut some diamonds from the left over stencilled panel and added them to the top left and bottom right corners with liquid glue.  I stamped the sentiment in black ink in the upper centre of the panel.  I adhered the panel to my card base with double sided tape.  

I would like to enter my card into the following challenges:

Color Throwdown challenge - kraft, fuchsia and orange
Creative Inspirations challenge - stars and/or stripes (there are stripes in my background)
Creative Friday challenge - neon colours or bold colours
Die Cut Divas challenge - birthday cards
Inkspirational challenge - three of the same (3 pearl embellishments)
Stencil Fun challenge - anything stencil goes optional twist your flag colours
The Paper Funday challenge - ATG optional twist fun with stencils
Tic Tac Toe challenge - layers, free, summer colours
Word Power challenge - make the sentiment the focus of your card

I hope you can join in with this fun challenge. Please pop over to the blog to find out all the details and to check out the gorgeous creations by the Design Team too.

I hope you enjoy the last bit of your weekend and thanks so much for stopping by.

Love and hugs,

card supplies:
Gina K Designs - ink pads - passionate pink and tangerine twist
Gina K Designs - star flower stamp (for outside sentiment)
Gina K Designs - pearl mix - black, gold & silver metallic
Clearly Besotted Stamps - simply said birthday stamp (for inside sentiment) - retired
W Plus 9 - sunshine layers die set - retired
Crafter's Companion - kraft cardstock
Limetree Crafts - 250gsm silky smooth white card - not currently available - but they do have 280gsm silky smooth white card available here
Versafine - onyx black ink pad

Wednesday, 28 August 2024

Summer Soiree Card Making IG Hop - Week 11

Hello friends; I hope you've had a great start to your week.    

It's Week 11 and the final week of our Summer Soiree IG card hop, which has been organised by my lovely friend Kelly. I'm a little sad that our hop is coming to an end but don't worry we will be starting our 'fall' hop very soon.  Our theme for the last week is 'rainbows' so you can use images/dies of rainbows or even just rainbow colours.  What a fun theme.  
Initially I was going to use rainbow colours and not go for the obvious choice but I found a cute rainbow die and changed my mind lol!  
Here is my card:
A closer look:
Plus I decorated the inside:
I began by die cutting my white panel using a scalloped die and also cut a frame using the same die set.   I used the rainbow die and cut out each band using card from my scraps bin.  I used one of the negative parts of the die cut to place my bands back into place and then added some double sided tape to the back to keep them secure.  I used some white card and die cut out some small clouds.  I actually remembered to stamp my sentiment before I added any dimension to my panel and stamped this at the bottom in black ink.  I added thin foam tape behind the frame and adhered it to the matching white panel.  I added foam squares behind my rainbow and added that at a slightly jaunty angle inside my frame and added the clouds with a mixture of foam squares and liquid glue.  At the last minute I realised I had meant to stamp some raindrops so carefully using an acrylic block I stamped them around the rainbow in a light grey ink (thankfully they all turned out ok).  I adhered my panel onto the card base with double sided tape.  I wasn't going to add any embellishments but I must have gotten some ink on my fingers and there were a few smudges on the sides of the frame so decided to cover them with some silver sequins and they look ok I think.  For the inside I die cut another panel with the scalloped die and stamped the sentiment in the centre with black ink.  In the same die set as the scalloped frame there was a mini rainbow so I decided to use that on the inside of the card.  Again I cut it out using scraps from my scraps bin and some clouds from white card.  I adhered the rainbow with double sided tape and the clouds with liquid glue.  I stamped 3 sets of raindrops around the rainbow.  The panel was then adhered to the card base with double sided tape.  It turned out being a really fun card with a pop of colour, which I think could be used for quite a few occasions.  I hope you like it. 

I would like to enter my card into the following challenges:

Addicted to Stamps & More challenge - die cuts and/or stencils
Colorful Options challenge - yellow-green or rainbow
Crafters Cafe challenge - ATG option rainbows/lots of colours

If you would like to follow the hop over on Instagram please use the hashtag #summersoireecardmakinghop2024 to find us or alternatively visit my profile and you will find the list of participants in my post.  We would love it if you would give the summer soiree challenges a try and again use the hashtag and we will find your projects.  

I'll be back tomorrow with my card for the Krafty Chicks challenge but until then enjoy the rest of your day and thank you for stopping by. 

Love and hugs,

Card ingredients:
Paper Smooches - rainbow die - retired 
W Plus 9 - sunshine layers die set - retired
MFT - cutest clouds ever die set - retired 
Gina K Designs - soft stone ink pad
Versafine - onyx black ink pad
coloured card from scraps bin

Wednesday, 7 August 2024

Summer Soiree Card Making IG Hop - Week 8

Hello friends; I hope you've had a great start to your week.  I can't believe it's Wednesday already.  It only seems like 5 minutes ago I was posting last week's card! 

We are now up to Week 8 of our Summer Soiree IG card hop, which has been organised by my lovely friend Kelly. This week's theme is 'you are my sunshine' so think sunshine, sun-rays, yellow, encouragement etc. 
I decided to take the theme very literal this week and created and fairly clean and simple but at the same time super cute card (I think so anyway lol!).  I hope you will like it.
Here is my card:
A close up of the cute sunshine:
I also decorated the inside:
I began by cutting a white panel 4" x 5 1/4" from smooth white card and ran it through my die cutting machine with a sun-rays embossing folder.  I didn't actually have a sun die (I know shock horror) so used a pinking edge circle and matching smaller circle die that I found in a set from MFT.  I cut them from some orange and yellow offcuts that I had in my scraps bin.  I also die cut some clouds from white card.  I used the same yellow card to die cut the word 'sunshine' and also 2 more from white card so that I could glue them together for some dimension.  I did some stamp surgery on one of my stamps and used part of it to stamp 'you are my' in black ink onto white card; which I then cut with a sentiment strip die.  I added the circles together with liquid glue and added them to my panel with double sided tape.  I added the larger cloud with foam squares and the smaller cloud with a mix of foam squares and liquid glue as it overlapped the larger cloud.  The die cut sentiment was added with liquid glue and I added the stamped sentiment with foam squares.  The panel was added to my card front with foam tape.  I didn't add anything else as I thought it was cute as it was.  For the inside I cut another white panel 4" x 5 1/4" and cut a white strip 2" x 4" and again ran it through my die cutting machine with the embossing folder.  I die cut another 'sun' and one small cloud. I added the embossed strip, sun and cloud with double sided tape.  I stamped a sentiment in the upper centre of the my panel with black ink.  A really fun card I think.  

I would like to enter my card into the following challenges:

AAA Cards challenge - anything CAS goes optional twist holidays/travel
Can You Handle The Pressure challenge - anything embossing goes option things with wings
CAS on Friday challenge - two colours (with white or cream) -  I used yellow and orange with white
CRAFT challenge - summer 
Die Cut Divas challenge - wet or dry embossing (I used an embossing folder)
If You Give A Crafter A Cookie challenge - be happy (inspired by smiley face/colour)
Double Trouble challenge - what makes you happy/include a smile and/or smile sentiment
Simply Clean and Simple challenge - anything CAS goes option off centre
The Four Seasons challenge - anything goes summer
Word Power challenge - make the sentiment the focus of your card

If you would like to follow the hop over on Instagram please use the hashtag #summersoireecardmakinghop2024 to find us or alternatively visit my profile and you will find the list of participants in my post.  We would love it if you would give the summer soiree challenges a try and again use the hashtag and we will find your projects.  

I'll be back tomorrow with my card for the Krafty Chicks challenge but until then enjoy the rest of your day and thank you for stopping by. 

Love and hugs,

card ingredients:
MFT - blueprints 13 (for circles) - retired
W Plus 9 - sunshine layers die set (for sunshine word) - retired
Clearly Besotted Stamps - sky's the limit (for clouds) - retired
MFT - beach bunnies stamp (for 'you are my' sentiment)
MFT - Polynesian paradise (for inside sentiment) - retired
Gina K Designs - sentiment strips dies
Lawn Fawn - you're the zest (for face on the sun)
We R Memory keepers 6" x 6" embossing folder (unsure of the name)
Versafine - onyx black ink
coloured card from my scraps bin

Thursday, 18 July 2024

Summer Soiree Card Making IG Hop - Week 5

Hello friends; I hope you've had a great start to your week.  I'm still playing catch up with my posts as Wesley is occupying most of my time at the moment.  He is chewing everything he can find and doesn't know what to do next; I'm sure (insert hope!) he will calm down soon.  He is full of fun though and very loving and cuddly.  

It's week 5 of our Summer Soiree IG card hop, which has been organised by my lovely friend Kelly. This week is all about 'summer gardening' so we want to see all your gardening images i.e. flowers, wheelbarrows, veggies, spades etc.  

I made a clean and simple card this week, as I had to take make the most of puppy naps, and used a image from LOTV which features two cute critters, a wheelbarrow and some apples, which I thought was ideal.  I hope you like it.  
Here is my card:
A close up of the cute image:
I decorated the inside:
I began by stamping my image onto alcohol marker friendly card and coloured it with my Promarkers; adding some highlights with a white gel pen.  I stamped a sentiment below the image in black ink.  I wanted to keep my card fairly clean and simple so use a scallop die to cut a piece of red dotty paper, a smaller green piece of card and also the image panel so that they would all line up when I adhered them together using liquid glue.  I added the layered panel to my card base with foam tape.  I didn't add anything else as I liked it as it was.  For the inside I cut a white panel 4" x 5 1/4" and added a strip of the dotty paper and green card to the bottom with double sided tape.  I stamped just a small part of the image above the border and coloured it with Promarkers.  I think it looks really cute with just a tiny part of the image showing on the inside.  I didn't add a sentiment inside as I thought the outside was quite generic so could be used for multiple of occasions and I would add one later.  

I would like to enter my card into the following challenges:

Aud Sentiments challenge - bookmarks and/or hobbies + sentiment (gardening)
Birthstone challenge - ruby/peridot optional twist thank you
Crafty Animals challenge - ATG must include an animal
Crafty Catz challenge - ATG option make it cute
Critter Crazy challenge - ATG with a featured critter
Inkspirational challenge - feature products from 2 different companies
Love Those Pretty Papers challenge - ATG must use patterned paper
The Cutie Pie challenge - beginning with B (bear, bunny)
The Paper Funday challenge - ATG option critter crazy

If you would like to follow the hop over on Instagram please use the hashtag #summersoireecardmakinghop2024 to find us or alternatively visit my profile and you will find the list of participants on my post.  We would love it if you would give the summer soiree challenges a try and again use the hashtag and we will find your projects.  

I'll be back tomorrow with my card for the Krafty Chicks challenge but until then enjoy the rest of your day and thank you for stopping by. 

Love and hugs,
 
card ingredients:
W Plus 9 - sunshine layers die set (for scalloped die) - sadly now closed
Elzybells - sentiment stamp set - sadly closed many years ago
Echo Park - dots & stripes Valentine 6x6 paper pad - retired
Heffy Doodle - alcohol marker friendly card - sadly now closed
Promarkers
green card from scraps bin

Monday, 21 August 2023

You've passed!

Hello again friends; I hope you've had a great start to the week.  Hubby had his clips out today, which thankfully was quick and painless.  Apart from an allergic reaction to the plasters covering them, his wounds look fab and have healed really well.  Physio on Thursday, although not sure what they will tell him to do as he is walking around the house and up and down the stairs without too much trouble.  

I'm here today to share a card that I made for my son's work colleague who's daughter had passed her driving test.  I have to be honest I don't make many cards for this occasion so had to search through my stash for a 'you've passed' sentiment but eventually found one in my trusty Clearly Besotted oldies.  I'm never de-stashing my CBS stamp sets as they are so useful and I find myself reaching for them often.  

Here is my card:


and a closer look:


CAS decoration on the inside:


I began by die cutting the cute car from grey card and cut the additional pieces in mostly black, except for the hubcaps which I cut from silver card.  The cute dog was stamped and coloured with Promarkers and I fussy cut him out.  I glued the dog behind the car so that it looked like it was inside.  I put the car to one side and worked on my background.  I cut a piece of light blue card and added a strip of grey card to bottom and used my white gel pen to draw a faux road and at the top of the blue panel I added some white die cut clouds.  The L plate was created by die cutting a letter L from red card and adhering it to a white square.  I then took a torn edge die and cut the white square in half to look like it was ripped apart.  To assemble my card I added the car with foam squares along the 'road' and added the L plate below, also with foam squares.  The clouds and sentiments were attached with liquid glue.  The panel was added onto a white card base with foam tape; this was then matted onto a black panel.  I think the finished card turned out quite cute.  

I would like to enter my card into the following challenges:

Allsorts challenge - all creatures great and small
Try It On Tuesday challenge - sing a song (inspired by Madness 'driving in my car)
Cut It Up challenge - create a scene
Tic Tac Toe challenge - die cuts/free/alphabet (I die cut a letter L for my L plate)

Thanks for stopping by today; I hope you enjoy the rest of your afternoon/evening.  I appreciate you taking the time to comment and for all the love you leave for my little works of art.  

Love and hugs, 


card ingredients:

MFT - cute caravan die set
MFT - missing you every single day stamp set
MFT - little letters 
MFT - blueprints 13 (for die cut circles inside)
Clearly Besotted Stamps - framed sentiments
Gina K Designs - sentiment strip dies
Gina K Designs - so many sentiments (for the inside sentiment)
W Plus 9 - sunshine layers (for the cloud die cuts)
coloured card from stash
Limetree Crafts - 250gsm smooth white card
Sakura - gelly roll 10 white pen

Saturday, 1 July 2023

AAA birthday challenge - DT card

Good morning friends and welcome to July!  Another month has bitten the dust and we are bang in the middle of summer time now.  I'm back with my DT card for this month's AAA birthday challenge and this month our theme is 'butterflies' which has been chosen by Elaine.  Our guest designer this month is Janja so please pop over and say hello.  


For my card I am using a new to me stamp and die set from W Plus 9 and it is gorgeous.  I decided to make a shaker card and went very clean and simple on this one.  Here is what I made:


and a slightly closer look:


I began by die cutting the 'beautiful' word (which thankfully comes as one piece) from white cardstock and added acetate over the opening to make my shaker window.  I then took a sentiment stamp which actually said have a sweet birthday and masked off the bits I didn't need and stamped the words in Versafine onxy black ink.  I stamped the butterflies in Versamark and white heat embossed them and cut them out with the matching dies.  I also decided to soften them by die-cutting another of each butterfly in vellum and adding them on top.  I added foam tape to my white card panel and added the shaker mix before sealing it closed.  I finished off with some matching sequins and voila my card was done.  It turned out just as I wanted and I think the colours look really fresh.  

Please pop over to the blog to see the creations from the rest of the design team; you won't be disappointed.  

I would like to enter my card into the following challenges:

Sweet Stampin' challenge - no designer paper (I stamped and heat embossed my butterflies before ink blending)
Addicted to CAS challenge - celebration (if my card isn't CAS enough please remove me)

Shopping Our Stash challenge - sentimentally yours
Papercraft challenges - girls, girls, girls
NBUS challenge - new stamp/die set

I really hope you can join us and cannot wait to see all your beautiful butterfly creations.  Please remember that we only accept birthday cards.  

I really appreciate you stopping by and leaving me such lovely and positive comments.  

Have a great day.  

Love and hugs, 


Card ingredients:

W Plus 9 - beautiful butterflies
MFT - sweet celebrations 
Heffy Doodle - white card
sequin mix from my stash (I think it was a freebie)