My Lovely Followers

Showing posts with label Crafter's Companion. Show all posts

Thursday, 8 January 2026

Krafty Chicks challenge #802 - Christmas

Good morning lovely friends, I hope you're having a good week so far. We are forecast lots of snow tonight so I won't be going anywhere for the foreseeable; at least it will give me some time to catch up on crafty projects lol!  It's time for a new challenge over at Krafty Chicks challenge and this week we are on Week 2; as always the theme is 'Christmas' and I am your hostess. It's time to start building up our Christmas card stash again so why not come over and join in the fun with us.
I love the look of kraft with red, green and gold so that was my colour combo for today's card.  I kept it fairly clean and simple but I think it turned out great.  I hope you like it too. 
Here is my card:
A closer look at the details:
Plus I decorated the inside:
I began by cutting a white panel 4" x 5/14" and decided to make my own background paper using some diagonal border stamps.  I stamped each edge of the panel using a red ink pad because that was the only part of the background you were going to see.  I took a kraft card panel 3 1/2" x 5 1/4" and stamped the tree image in a dark green ink.  I also heat embossed the sentiment below with gold embossing powder.  I die cut a small star from gold mirror card and adhered it to the top of the tree with liquid glue.  Finally I added some white gouache splatters for some extra interest.  I adhered the panel onto the background with double sided tape.  I didn't add any dimension or embellishments to this card to make it cheaper for posting.  For the inside I cut another panel 4" x 5 1/4" and stamped the sentiment in the centre with the dark green ink.  I stamped another border using the red ink along the bottom.  I adhered the panel to the card base with double sided tape.  A fairly quick and simple card and this would be a good one to mass produce if you needed to. 

I would like to enter my card into the following challenges:

The 12 Months of Christmas Link Up challenge - ATG Christmas optional twist snow people
Aud Sentiments challenge - ATG + sentiment 
Classic Design challenge - make it merry
Inkspirational challenge - shine/shiny (I used mirror card and gold embossing powder)
Merry Little Christmas challenge - anything Christmas goes
Papercraft challenges - festive sparkle
Peace on Earth challenge - anything Christmas themed optional mood board
We Love Stamping challenge - something new/ATG (I chose the ATG option this time)

I hope you will be able to join us for our 'Christmas' challenge and I cannot wait to see your creations in our linky. Please leave some love for my fellow chicks - Leanne, Diane and Lori.

Thank you so much for stopping by; I appreciate your lovely comments.

Love and hugs,
card supplies:
Clearly Besotted - modern Christmas stamp - retired
Clearly Besotted - diagonal stripes stamp - retired
Clearly Besotted - mini calligraphy stamp (for outside sentiment) - retired 
Clearly Besotted - simply said Christmas stamp (for inside sentiment) - retired
Versafine Clair - nocturne ink pad
*Gina K Designs - ink pads - Christmas pine & red velvet
Crafter's Companion - kraft cardstock 
gold mirror card from stash

*I now have an Affiliate Link for the Gina K Designs store. If you are considering making a purchase I would appreciate you using my link as it will earn me a small commission at no extra cost to you. 
Thank you x

Wednesday, 17 September 2025

Cards For All Seasons IG Hop Week 19 - autumn

Hello friends; I hope you're having a great week so far. I'm back today to share my card for this week's Cards for All Seasons IG hop organised by my lovely friend Kelly. We are now on Week 19 and our theme is 'all things fall'. Such a fun theme this week; think pumpkins, leaves, hot drinks, even halloween.  There are going to be so many awesome creations along the hop this week and I can't wait to see what sparks your imagination.
As the latest Spellbinders Club Kits had just landed on my desk it would have been rude not to use them right?  I ordered the small die of the month which had the fantastic pumpkin, cat and ghost and the 2D embossing folder which has a flowing leaves design which is gorgeous.  I decided to go all out autumn so didn't use the cat or ghost this time but they will definitely come in handy for Halloween.  My card is full of colour and dimension and I hope you like it. 
 Here is my card:
A closer look at the details:
Plus I decorated the inside:
I began by die cutting all the elements and ink blended over them for some extra definition.  I die cut the wavy rectangle from kraft card and then used the embossing folder.  I swiped over the embossing folder with some white pigment ink.  I adhered the pumpkin and lid with foam squares but everything else was added with liquid glue.  I white heat embossed the sentiment onto the same kraft card and cut it out with a sentiment strip die and added this above the die cuts with foam squares.  I added some scrap white card behind the kraft panel and then adhered this to the card base with double sided tape. I finished off with a few gold sequins.  For the inside I cut two white wavy rectangles and embossed one with the folder.  I cut the embossed one down to a strip and adhered that the bottom of the plain one with liquid glue.  I die cut a few more leaves and arranged them in the bottom right corner with liquid glue.  I added the panel to the card base with double sided tape.  I will add a sentiment when I'm ready to send it out.  A really fun card with lots of interest and colour.  

I would like to enter my card into the following challenges:

613 Avenue Create challenge - ATG optional twist lots of leaves
A Cut Above challenge - ATG must use a die cut
Allsorts challenge - tree, leaves and plants
Can You Handle The Pressure challenge - ATG optional twist lots of layers
Classic Design challenge - ATG optional twist trees or leaves
Crafty Calendar challenge - lots of layers
Crafty Gals Corner challenge - fall.....colours
The Four Seasons challenge - fall optional mood board
The Paper Funday challenge - ATG optional twist changing seasons
Tic Tac Toe challenge - rectangle, three of more colours, embossing

I hope you will pop over to Instagram and check out the hop; please use the hashtag #cfascardhop2025 to see all the gorgeous creations and also if you want to participate we will be able to find you.

I'll be back tomorrow with my card for the Krafty Chicks challenge so I hope you will pop back and check it out. Until then thank you so much for stopping by. 

Love and hugs,

card supplies:
Gina K Designs - harvest silhouettes stamp (for sentiment)
Gina K Designs - sentiment strips die
Gina K Designs - white pigment ink cube
Limetree Crafts - 280gsm smooth white card
Crafter's Companion - 280gsm Kraft card

Wednesday, 3 September 2025

Cards For All Seasons IG Hop - Week 18

Hello friends; I hope you're having a great week so far. I'm back today to share my card for this week's Cards for All Seasons IG hop organised by my lovely friend Kelly. We are now on Week 18 and our theme is 'the great outdoors'. Such a fun theme this week; think camping, tents, campfires, bears, etc. There are going to be so many awesome creations along the hop this week and I can't wait to see what sparks your imagination.
I managed to get my hands on this fun camper van stamp & die set from Heffy Doodle before it closed and had never used it so I thought it would be perfect for this week's theme.  It's a tiny set that also includes a sentiment, a small tree and some silhouette flying birds (the 'tick' style ones). The layout was inspired by a card I saw on Pinterest.  I think it turned out super cute and I hope you like it too. 
Here is my card:
A closer look at the camper van:
Plus I decorated the inside:
I began by stamping the camper van onto alcohol marker friendly card, coloured it with Promarkers, added a few white gel pen highlights and cut it out with the coordinating die.  I also stamped 9 of the trees in 2 shades of green ink and again used the matching die to cut them out.  I cut a brown panel of card 3 15/16" x 5 3/16" and used a very old cuttlebug embossing folder for some texture.  I added it to a kraft mat layer that was cut to 4" x 5 1/4" with liquid glue. I cut the orange patterned paper 3 1/16" x 4 1/4" and again adhered it to a kraft layer with liquid glue.  The checked paper was cut to 1 9/16" x 4 15/16" and matted onto a kraft layer with liquid glue.  I added the paper layers to the embossed panel with liquid glue.  I die cut a circle from kraft card and stamped the sentiment at the very bottom using a dark brown ink pad (the birthday came from another set).  I added the trees with liquid glue and the camper van with foam squares.  The circle was adhered to the lower right corner of the panel with foam squares.  For a final finishing touch I added some orange and green enamel dots.  I added some scrap white card behind the panel for stability and dimension and then adhered it to the card base with double sided tape.  For the inside I cut a white panel 3 7/8" x 5 1/8" and adhered it to a kraft mat with liquid glue.  I added a strip of orange paper to the top and a strip of the checked paper to the bottom of the panel with liquid glue.  I added 2 of the trees and another camper van to the bottom left corner with liquid glue.  Finally I stamped a sentiment in the centre with dark brown ink. The panel was adhered to the card base with double sided tape.  

I would like to enter my card into the following challenges:

A Cut Above challenge - ATG with a die cut (I die cut my camper van, trees and circle)
Allsorts challenge - birthdays
As You Like It challenge - favourite colouring medium (Promarkers, I've used them for over 15 years and love them.  The blend well and I still have my original pens for the most part)
Christmas (or not) BINGO challenge - Line G - kraft, free, hand-coloured image
Classic Design challenge - ATG optional twist happy birthday
Crafter's Cafe challenge - ATG optional twist use patterned papers
Die Cut Divas challenge - ATG (I die cut my camper van, trees and circle)
Dream Valley challenge - 2 or more papers
Inspiration Station challenge - inspiration photo (I was inspired by the trees and colours)
Simon Says Stamp Monday challenge - stamp it in STAMPtember
The Four Seasons challenge - fall/inspiration photo (I was inspired by the colours)

I hope you will pop over to Instagram and check out the hop; please use the hashtag #cfascardhop2025 to see all the gorgeous creations and also if you want to participate we will be able to find you. 

I'll be back tomorrow with my card for the Krafty Chicks challenge so I hope you will pop back and check it out. Until then thank you so much for stopping by.

Love and hugs,

card supplies:
Heffy Doodle - happy camper stamp & die set - store now sadly closed
Heffy Doodle - alcohol marker friendly card - store now sadly closed
Promarkers
LDRS Creative - happy fall 6x6 paper pad - no longer available
Honey Bee Stamps - swimming by stamp (for birthday word)
Gina K Designs - dark chocolate ink pad
Crafter's Companion - 280gsm kraft card
MFT - just roll with it stamp (for inside sentiment)
Provo Craft/Cuttlebug - forest branches embossing folder
Your Next Stamp - summer chill enamel dots

Thursday, 7 August 2025

Krafty Chicks challenge #780 - birthday

Good morning lovely friends. I hope you're all doing ok and having a great week so far. It's time for a new challenge over at Krafty Chicks challenge and this week we are on Week 1; as always the theme is 'birthday' and Leanne is our hostess. It can't get any easier than this week's challenge so we hope you will come over and join in the fun with us.
It was Willow the cat's 4th birthday at the beginning of the week so of course I had to make a card for her!  Like most cats she is in love with cardboard boxes; any size, shape, colour, if we have a box it is soon hers lol!  Of course I decided that I had to make a box card for her, which even if I say so myself, turned out super cute.  There are a few extra photos today as it was really difficult to capture everything.  I hope you like it too.  
Here is my box card:

A closer look at the cute kitty image:

Some extra views to capture the details:

I tried to make my own Amazon logo lol!
Here is the crazy kitty which was my inspiration:

I used a die to cut out the box using kraft card as I wanted it to look like cardboard.  The die has a beautiful decorative edge to the flaps but I didn't want that look for this project so simply trimmed that part off with my paper trimmer.  I used double sided tape to secure my box together.  I also die cut 2 of the inside pieces of the box from kraft which supports the box plus allows you to arrange your images and fill up the box.  I stamped all the images onto alcohol marker friendly card, coloured them with Promarkers and then used the coordinating dies to cut them out.  I die cut the letters to spell her name and also the number 4 x 4 times from white card and stacked them up using liquid glue.  I originally was going to put some of the smaller images onto acetate and secure them higher for some extra interest but I didn't really like it so cut the acetate off except for the fish which is still raised a little higher.  I arranged the images where I wanted and adhered them with liquid glue.  I added the name and number onto the front of the box and also added a birthday sentiment onto the front flap.  At the last moment, for a bit of fun, I attempted to draw my own Amazon logo on the side of the box; it's not perfect but it made me chuckle lol!  I think it turned out super cute.

I would like to enter my box card into the following challenges:

Aud Sentiments challenge - any shape (except rectangle) and/or washi tape +s sentiment
Crafty Animals challenge - ATG must include an animal
Creative Creases challenge - ATG with a fun fold
Critter Crazy challenge - ATG with a featured critter
I Love Promakers challenge - ATG or black and white
Show Us Your Pussycats challenge - ATG featuring a cat
The Paper Funday challenge - ATG optional twist '4 legged friends'

I hope you will be able to join us for our 'birthday' challenge and I cannot wait to see your creations in our linky. Please leave some love for my fellow chicks - Leanne, Diane and Lori.
Thank you so much for stopping by; I appreciate your lovely comments.

Love and hugs,

card supplies:
Neat & Tangled - kitty's favourite things stamp & die
Neat & Tangled - puppy's favourite things stamp & die (for present, cupcake & hat)
Promarkers
MFT - little letters die-namics
Spellbinders - simply perfect alphabets (for number 4)
Crafter's Companion - 280gsm kraft cardstock
Limetree Crafts - 250gsm silky smooth white card - not currently available - but they do have 280gsm silky smooth white card available here - but limited numbers
Versafine - onyx black ink pad
Heffy Doodle - alcohol marker friendly card - store now closed

Sunday, 6 July 2025

Dragonfly Dreams challenge - guest designer

Good morning and happy Sunday lovely friends. I hope you are all doing ok and finding lots of time to get crafty.  Well the weather has taken a turn for the worse and we had quite a bit of rain yesterday, although it was still really humid.  Let's hope it's only a blip and the sun will return soon.  
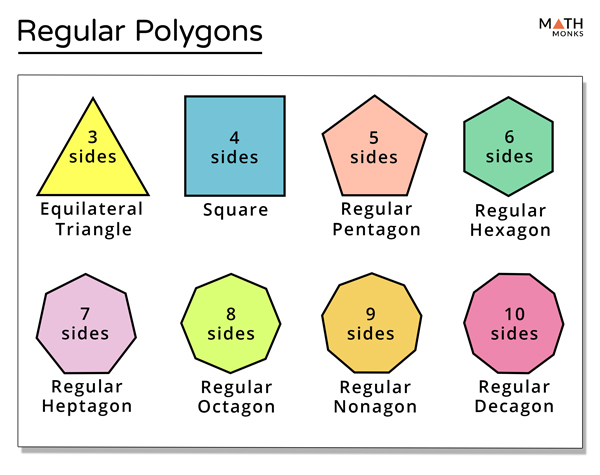
I am delighted to be a guest designer over at Dragonfly Dreams challenge this month and they have a fantastic theme of 'use polygons'.  It's such a unique challenge but don't be put off by the name as it's easier than it sounds.  So many shapes are polygons so you won't have to think too hard to take part. 

For my card I decided to go with a diamond shape as I wanted to use a Uniko stencil which was a recent purchase.  It is such a clever stencil and the results are gorgeous.  I hope you like it.
Here is my card:
A closer look at the background:
Plus I decorated the inside:
I began by cutting a white panel 5 1/2" square as I wanted some extra for the inside of my card.  I used a pink and orange colour combo, which is one of my faves, along with kraft card as my neutral.  I grabbed the Uniko stencil and firstly inked the pink part, once that is complete you clean the stencil and then flip it over so that you can ink the orange part.  It's such a clever stencil and even a messy crafter like me was impressed at how well it lines up and looks so crisp.  I cut a scalloped panel from the kraft card and then cut down my stencilled panel to fit inside and also used my corner rounder to match the stitching on the kraft panel.  I adhered them together with liquid glue.  I decided to make my sentiment panel a diamond shape also as I didn't think it would look right with a square or circle so hand cut the white diamond and also a mat layer from vellum.  I stamped the sentiment in black ink and then layered the two diamonds with foam squares.  It was also added to the panel with foam squares for lots of dimension.  I finished off with some black pearls.  I added some scrap white card behind the panel for some thin dimension and stability and then added it to my card base with double sided tape.  For the inside I cut another kraft panel and layered a white panel on top with liquid glue.  I fussy cut some diamonds from the left over stencilled panel and added them to the top left and bottom right corners with liquid glue.  I stamped the sentiment in black ink in the upper centre of the panel.  I adhered the panel to my card base with double sided tape.  

I would like to enter my card into the following challenges:

Color Throwdown challenge - kraft, fuchsia and orange
Creative Inspirations challenge - stars and/or stripes (there are stripes in my background)
Creative Friday challenge - neon colours or bold colours
Die Cut Divas challenge - birthday cards
Inkspirational challenge - three of the same (3 pearl embellishments)
Stencil Fun challenge - anything stencil goes optional twist your flag colours
The Paper Funday challenge - ATG optional twist fun with stencils
Tic Tac Toe challenge - layers, free, summer colours
Word Power challenge - make the sentiment the focus of your card

I hope you can join in with this fun challenge. Please pop over to the blog to find out all the details and to check out the gorgeous creations by the Design Team too.

I hope you enjoy the last bit of your weekend and thanks so much for stopping by.

Love and hugs,

card supplies:
Gina K Designs - ink pads - passionate pink and tangerine twist
Gina K Designs - star flower stamp (for outside sentiment)
Gina K Designs - pearl mix - black, gold & silver metallic
Clearly Besotted Stamps - simply said birthday stamp (for inside sentiment) - retired
W Plus 9 - sunshine layers die set - retired
Crafter's Companion - kraft cardstock
Limetree Crafts - 250gsm silky smooth white card - not currently available - but they do have 280gsm silky smooth white card available here
Versafine - onyx black ink pad

Thursday, 26 June 2025

Krafty Chicks challenge #774 - masculine

Good morning lovely friends. I hope you're all doing ok and having a great week so far. It's time for a new challenge over at Krafty Chicks challenge and this week we are on Week 4; as always the theme is 'masculine' and Lori is our hostess. I know masculine makes can be difficult but we always need them so take the challenge and get ahead.  We hope you will come over and join in the fun with us.
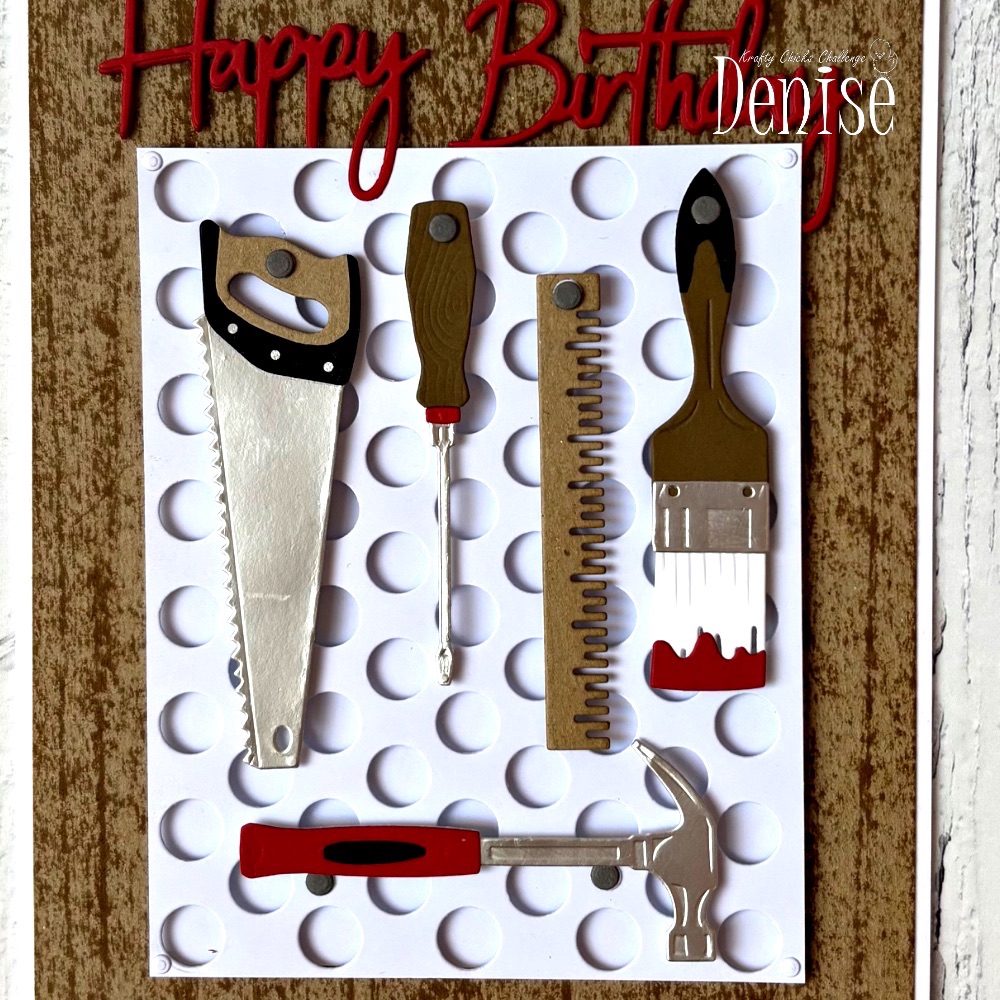
Today's card was made for my brother-in-law who is a carpenter.  I recently bought this die set especially to use for his card but I think it will be useful for lots of my masculine relatives.  I hope you like it.
A closer look at the tools:
Plus I decorated the inside:
I began by die cutting all the tools using card from my scraps bin and assembled them using liquid glue.  I wanted to replicate a peg board but unfortunately I don't have a die for that so just used a die plate with lots of circles (which are a little large but I think it works).  I created my background by swiping my brown ink pad down a piece of kraft card to resemble wood graining or planks (as per Gina K).  I attached the wood graining panel onto my 5" x 7" card base with double sided tape.  I then took my faux peg board and added tiny foam squares behind it and adhered it onto a white panel so that it would have some space between the layers, as per a real peg board.  I adhered the die cut tools with foam squares along the peg board.  I wanted it to look like there were pegs holding up the tools so I die cut some small circles from dark grey card and added them with liquid glue.  I added the peg board piece onto the panel with double sided tape.  I die cut the happy birthday sentiment 4 times from red card and adhered them together with liquid glue.  This was added above my peg board with liquid glue.  I white heat embossed the brother in law sentiment onto red card and cut it out with a sentiment strip die; this was then added below the peg board with foam squares.  I didn't add any embellishments as I thought there was lots going on already.  For the inside I cut a white panel 4 3/4" x 6 3/4" and added a thin strip of the wood grained card to the top and bottom with liquid glue.  I die cut another ruler and screwdriver and adhered them with liquid glue over the bottom strip.  I stamped the sentiment in the centre of the panel with a dark brown ink pad and then adhered the panel to the card base with double sided tape.  I'm really happy with how this card turned out and my BIL loved it.  

I would like to enter my card into the following challenges:

613 Avenue challenge - ATG optional twist masculine
Addicted to Stamps & More challenge - die cuts and/or stencils
The Crafter's Cafe challenge - ATG optional masculine
Inspired by challenge - s'mores (I was inspired by the colours)

I hope you will be able to join us for our 'masculine' challenge and I cannot wait to see your creations in our linky. Please leave some love for my fellow chicks - Leanne, Diane and Lori.

Thank you so much for stopping by; I appreciate your lovely comments.

Love and hugs,

card supplies:
Spellbinders - all the tools die set
MFT - peek-a-boo polka dots die (for faux peg board)
Gina K Designs - lots of dots die set (for small circles)
Gina K Designs - warm cocoa ink pad
Stampin' Up! - family party stamp (for BIL sentiment) - retired
Honey Bee Stamps - inside: birthday sentiments
Crafter's Companion - kraft cardstock
Limetree Crafts - 250gsm silky smooth white card - not currently available - but they do have 280gsm silky smooth white card available here
coloured & speciality card from scraps bin