My Lovely Followers

Showing posts with label versafine clair. Show all posts

Friday, 12 September 2025

Stencil Fun IG Hop - September

Happy Friday friends; I hope you've all had a great week, although the weather here has been total pants - rain, rain and more rain!!  I am joining a new Instagram Hop this month called Stencil Fun. It's a group of crafters who are determined to use their forgotten and neglected stencils.  I'm definitely guilty of this; I have so many stencils but usually forget to reach for them so this hop is perfect for me.  The theme is always anything goes but we will have an optional theme to use if we want to.  This month's optional theme is 'geometric' and as I love geometric designs it was a no-brainer to use it this month.  I'm excited to see who has used the optional theme.  

For my card I used a fun (and neglected) stencil from Uniko called 'abstract triangles'.  I decided to make extra work for myself my masking off each individual triangle so that I could colour the background in rainbow colours.  I used a ton of post-it notes but I think it was totally worth it.  I hope you like it too.
Here is my card:
a closer look at the stencilling:
Plus I decorated the inside:
I began by grabbing some white card and a rainbow selection of ink pads (along with lots of post-it notes) and ink blended the background.  It's not perfect by any means but I love the look of the rainbow colours.  The stencil was only just over 5" square so not quite big enough for a whole A2 background so initially I was going to cut it in half and make 2 cards but then I found this split background die in my stash that I thought would be perfect.  As it was an A2 sized background die it did mean that I had a gap in the middle but I thought that would be the perfect place for my sentiment.  I cut a white panel 4" x 5 1/4" and adhered the stencilled pieces with foam tape to the top and bottom.  It was at this point that I realised that I should have stamped the sentiment after adhering the top piece but didn't so had to stamp the sentiment onto a separate piece of paper and slide it into the gap and adhered it with liquid glue.  Thankfully it worked out ok but I was holding my breath lol!  I decided to create a black card base for a change instead of having a black mat layer and adhered the panel with double sided tape.  I was going to add some black pearls but both my grown up sons felt it looked better without so I actually took their advice for once!  For the inside I cut another white panel 4" x 5 1/4" and as I had a tiny piece of the stencilled background left over I adhered that to the bottom with liquid glue.  I stamped the sentiment in the centre with black ink and the panel was adhered to the card base with double sided tape.  It looks a fairly simple card but it took a while to complete the background but I love it.

I would like to enter my card into the following challenges:

Addicted to Stamps & More challenge - make your mark (ink blending)
Alphabet challenge - k for keep it simple
Classic Design challenge - ATG optional theme 'happy birthday'
Colourful Options challenge - ATG (I went for rainbow)
Make My Monday challenge - fun with stencils
Stencil Fun challenge - ATG but must use a stencil optional theme 'nature'

We hope you will be inspired by our Stencil Fun Instagram Hop and will pop over and check out all the gorgeous cards along the way. If you would like to join us please visit my Instagram page or use the hashtag #stencilfunseptember2025 and we will find you.

Thanks for stopping by and have a great weekend.

Lots of love

card supplies:
MFT - blueprints 18 die set
Gina K Designs - flowing florals stamp (for front sentiment) - retired
Gina K Designs - birthday cheer stamp (for inside sentiment)
Limetree Crafts - 220gsm black card 
Versafine Clair - nocturne ink pad

Thursday, 11 September 2025

Krafty Chicks challenge #785 - Christmas

Good morning lovely friends, I appreciate you stopping by and I hope you're all doing ok. It's time for a new challenge over at Krafty Chicks challenge and this week we are on Week 2; as always the theme is 'Christmas' and I am your hostess. Another card to add to the Christmas pile, which really takes the stress off later in the year. We hope you will come over and join in the fun with us.
I bought the Christmas in July card kit from Gina K Designs and haven't had a chance to use it yet so this week was the perfect opportunity to dig it out and christen it.  The hardest decision was deciding which stamp set to use as the kit is jam packed but I eventually chose the Christmas tree set.  I hope you like it.
Here is my card:
A closer look at the trees:
Plus I decorated the inside:
I began by die cutting the trees, stamping the spine with versamark and heat embossing with gold embossing powder.  I also stamped and heat embossed the sentiment and used the coordinating die to cut it out.  I then die cut the frame from white card.  I found the ink smooshed panel left over from last year (I used part of it on this card here) and cut it down to fit behind the frame and they were adhered together with liquid glue; I matted this onto a gold layer with double sided tape.  I used a dots embossing folder on another white panel and also matted this onto a gold layer with double sided tape.  I added the trees with foam tape and placed the sentiment across the trees with a mix of liquid glue and foam squares.  I added some scrap white card behind the frame panel and then adhered this onto the embossed panel with double sided tape.  I then adhered it to the card base with double sided tape.  I finished off with 3 mini gold pearls.  For the inside I cut a white panel 3 3/4" x 5" and added a gold mat layer with double sided tape.  I had a tiny piece of the smooshed background left over so adhered that the bottom of the panel with liquid glue and also added a thin strip of gold card above it.  I added another tree in the bottom right corner and stamped the sentiment in black ink in the centre.  The panel was then adhered to the card base with double sided tape.  It's a very dimensional card and one that I will definitely have to hand deliver.  

I would like to enter my card into the following challenges:

The 12 Months of Christmas Link Up challenge - anything Christmas goes optional circles or squares
ABC Christmas challenge - T is for trees
As You Like It challenge - flat or layered (I love adding layers to my cards as I like the texture and dimension it gives)
Cardz 4 Galz challenge - stitching real or faux (my frame has faux stitch detail)
Craft Rocket challenge - dots and/or stripes (my background is a dotty EF)
Crafty Calendar challenge - lots of layers
Creative Inspirations challenge - Christmas in September 
Die Cut Divas challenge - ATG (use at least 1 die cut or EF)
Dream Valley challenge - 2 or more layers
Let's Craft & Create challenge - ATG optional twist lots of layers
Merry Little Christmas challenge - anything Christmas goes
Peace On Earth challenge - anything Christmas themed optional mood board
Pearly Sparkles challenge - pink, pearls and/or sparkle
The Holly & Ivy Christmas challenge - anything Christmas goes

I hope you will be able to join us for our 'Christmas' challenge and I cannot wait to see your creations in our linky. Please leave some love for my fellow chicks - Leanne, Diane and Lori.

Thank you so much for stopping by; I appreciate your lovely comments.

Love and hugs,

card supplies:
Gina K Designs - O Christmas tree stamp & die set
Gina K Designs - Master Layouts 18 die set (for frame)
gold card from stash
Versafine Clair - nocturne ink pad
Versamark - watermark ink pad

Thursday, 28 August 2025

Krafty Chicks challenge #783 - Masculine

Good morning lovely friends. I hope you're all doing ok and having a great week so far. It's time for a new challenge over at Krafty Chicks challenge and this week we are on Week 4; as always the theme is 'masculine' and Lori is our hostess (although she is currently taking a short break). I know masculine makes can be difficult but we always need them so take the challenge and get ahead. We hope you will come over and join in the fun with us.
I recently purchased some new stamps from Uniko Stamps and they are perfect for clean and simple masculine makes.  I had fun creating my random pattern and although I'm not that good at random I think it turned out great.  I really enjoyed just using inks, stamps and paper for this card and the finished size is 5" x 7".  I hope you like it.
Here is my card:
A closer look at my stamping:
Plus I decorated the inside:
I began by creating my card base using white card cut to 10" x 7" and scoring on the long side at 5".  I cut a panel 4 1/2" x 6 1/2" from the same white card and using 4 different blue ink pads stamped my random pattern across the top half of the panel.  I also used a line stamp from the set and stamped that with black ink which I think is really fun.  I stamped the sentiment below using black ink and simply mounted the panel onto some blue card with double sided tape.  I added some scraps of the blue card behind my panel for dimension and stability and then this was adhered to the card base with double sided tape.  No embellishments this time as I don't think men really like them that much.  For the inside I cut another white panel and blue mat panel the same as the front.  I stamped a smaller version of the pattern at the bottom of the panel and a sentiment in the centre with black ink.  The panels were adhered together with double sided tape and then also added to the card base with double sided tape.  I really like how this card turned out; the stamp set is so much fun and there are unlimited ways to create fun patterns with it.  

I would like to enter my card into the following challenges:

AAA Cards challenge - anything CAS goes optional twist 'all the greens'
Allsorts challenge - I spy with something beginning with B - blue, birthday
Classic Design challenge - anything goes optional twist 'happy birthday'
Inkspirational challenge - clean and simple optional twist 'flowers'
Little Red Wagon challenge - G is for gentlemen
Simply Clean and Simple challenge - ATG CAS optional twist 'cute animals'

I hope you will be able to join us for our 'masculine' challenge and I cannot wait to see your creations in our linky. Please leave some love for my fellow chicks - Leanne, Diane and Lori.

Thank you so much for stopping by; I appreciate your lovely comments.

Love and hugs,

card supplies:
Uniko Stamps - floral vines stamp (for happy birthday sentiment)
Uniko Stamps - birthday sentiments stamp (for inside sentiment)
Gina K Designs - ink pads - blue sky, blue raspberry, blue denim, in the navy
Versafine Clair - nocturne ink pad
blue card from stash

Wednesday, 20 August 2025

Patterned Paper IG Hop - August

Hello friends; I hope you're having a great week so far.  I'm here today to share my card for this month's Patterned Paper Party Instagram Hop. Do you love patterned paper? Do you have a huge stash that needs using? Well so do we and it's time to get it used! We will be hopping on the 20th of each month to share our ideas. We will definitely be creating cards, but maybe sometimes tags, ATCs, gift bags, boxes, mini albums and scrapbook pages too. We want our patterned paper to be used.
The theme is always 'anything goes' but each month we will have an optional twist that can be used if you like; this month the twist is 'banner' so grab your banner dies and your patterned papers and have fun. I was inspired by a gorgeous layout I saw on Pinterest so that was my starting point.  I used pretty, soft colours and a CAS design.  I hope you like it.  
Here is my card:
A closer look at the pretty papers:
Plus I decorated the inside:
I began by cutting a white panel 4" x 5 1/4".  I wanted a strip of grey behind my banners but couldn't find any paper I liked so I cut a 1 1/2" strip from fog grey card and stamped a pin dot pattern in a tone on tone grey ink.  I added this to the right side of the panel with double sided tape.  I cut the banners from 3 different patterned papers (but from the same pad) and also one from white card, which I used to stamp my sentiment.  I'm finding lately that I need thank you cards so that's what I made today.  I adhered the 3 patterned banners in a staggered layout with liquid glue; the white banner was added over the top with foam squares.  I finished off with some enamel dots (I found quite a few packets recently so I'm trying to use them up).  I added some scrap white card behind my panel for stability and dimension and then this was added to my card base with double sided tape. For the inside I cut another white panel 4" x 5/14" and added a tone on tone stamped grey strip of card to the bottom with double sided tape.  I die cut another set of banners and adhered them at the bottom of the panel with liquid glue.  I stamped a sentiment in the centre with black ink.  The panel was adhered to the card base with double sided tape.  I'm really happy with how this card turned out and it was relatively quick to make too, which was a bonus.  

I would like to enter my card into the following challenges:

AAA Cards challenge - anything CAS goes optional twist 'all the greens'
A Cut Above challenge - ATG with a die cut
Allsorts challenge - I spy something beginning with B - banners
CAS Colours & Sketches challenge - colour challenge #567
Let's Craft and Create challenge - ATG must use a punch/die optional polkadots and/or stripes
Love Those Pretty Papers challenge - ATG focus on pretty papers optional summertime
Simon Says Stamp Wednesday challenge - stitch it (my banners have stitching detail)

We hope you will be inspired by our Patterned Paper Party IG Hop and will pop over and check out all the gorgeous creations along the way. If you would like to join us please visit my Instagram page or use the hashtag #patternedpaperpartyhopaugust2025 and we will find you.

I'll be back tomorrow with my card for the Krafty Chicks challenge, so I hope you can pop back and check it out.  Thanks for stopping by and take care.

Lots of love

card supplies:
Gina K Designs - Master Layouts 5 die set (for banner die)
Gina K Designs - sketched roses stamp (for sentiment) - last month's incentive set but will be available very soon
Gina K Designs - pin dot background stamp
Gina K Designs - you are enough stamp (for inside sentiment)
Gina K Designs - soft stone ink pad
Simon Says Stamp - fog gray card 
Echo Park - little girl dots & stripes 6x6 paper pad 
Versafine Clair - nocturne ink pad
My Mind's Eye - 'ashbury heights' enamel dots

Cards for All Seasons IG Hop - Week 17

Hello friends; I hope you're having a great week so far. I'm back today to share my card for this week's Cards for All Seasons IG hop organised by my lovely friend Kelly. We are now on Week 17 and our theme is 'galaxy/stars/outer space'. Such a fun theme this week; think space-ships, space-men or go for a bright star inspired card.  There are going to be so many awesome creations along the hop this week and I can't wait to see what sparks your imagination.
I really wanted to make a galaxy inspired ink blended background so ordered a space-ship die especially for today's card.  I'm really happy with how my background turned out and the finished card is so much fun.  I hope you like it. 
Here is my card:
A closer look at the space-ship:
Plus I decorated the inside:
I began by creating my galaxy background.  I used ink pads from Gina K Designs in lots of colours - blues, purple, pink and yellow and blended them until I was happy with how they looked.  I splattered some white gouache all over and left it to dry.  I die cut the space-ship (or should it be rocket?) from coloured card from my scraps bin and adhered it together with liquid glue apart from the front 'leg' which I added with a tiny foam square.  I also die cut the moon and stars from some yellow card and lightly ink blended some orange ink over them for some definition.  I didn't have a suitable sentiment in my stash so used my pc and printed one out and cut it with a sentiment strips die.  Once my background was dry I trimmed it down to 4" x 5 1/4" and arranged all the die cuts and added the larger ones with foam squares and the small stars with liquid glue.  The sentiment was added to the bottom left corner with foam squares.  I added some scrap white card behind my panel for stability and dimension and then added it to the card base with double sided tape.  For the inside I cut a white panel 4" x 5 1/4" and added the left-over pieces from my background to the top and bottom of the panel with liquid glue.  I stamped a sentiment in black ink in the centre and finished off with some die cut stars, which I added with liquid glue.  The panel was added to the card base with double sided tape.  

I would like to enter my card into the following challenges:

A Cut Above challenge - ATG with a die cut
Allsorts challenge - I spy something beginning with B - blue, birthday
Classic Design challenge - ATG optional twist 'happy birthday'
Little Red Wagon challenge - circle of life (moon and window in rocket are circles)
Tic Tac Toe challenge - yellow, ink blending, rectangle shape (card base)
Try It On Tuesday challenge - going around in circles (moon and window in rocket are circles)

I hope you will pop over to Instagram and check out the hop; please use the hashtag #cfascardhop2025 to see all the gorgeous creations and also if you want to participate we will be able to find you.

I'll be back later with another card so I hope you will pop back and check it out. Until then thank you so much for stopping by.

Love and hugs,

card supplies:
Spellbinders - to the moon die set
Clearly Besotted - simply said birthday stamp (for inside sentiment) - retired
Winsor & Newton - white gouache (for splatters)
Versafine Clair - nocturne ink pad
coloured card from scraps bin
Imagination Crafts - black glossy card
PC & printer for outside sentiment

Thursday, 17 April 2025

Krafty Chicks challenge #764 - CAS

Good morning lovely friends. I hope you're all doing ok and having a great week so far. It's time for a new challenge over at Krafty Chicks challenge and this week we are on Week 3; and as always the theme is 'CAS (clean and simple)' and Diane is our hostess. Now we know that CAS is subjective but generally it's lots of white space, no embellishments (or very few) and an uncluttered design.  It can be a difficult design to pull off but we hope you will take on the challenge and come over and join in the fun with us.
I haven't made any Easter cards yet this year and I've recently received the cutest set from Spellbinders so wanted to at least use it once this year!  I love the adorable bunnies in this set.  I love this card and may try and make a few more for my family but perhaps make the backgrounds different pastel shades for some variation.  I hope you like it.
Here is my card:
A closer look at the sweet bunny:
Plus I decorated the inside:
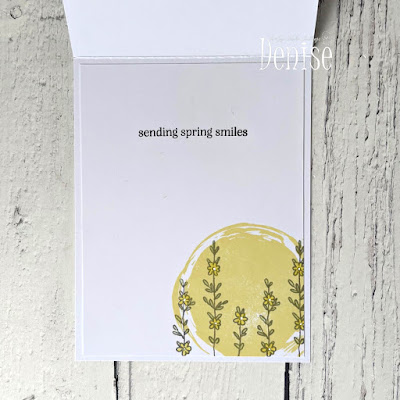
I began by stamping the bunny onto alcohol marker friendly card and coloured him with Promarkers.  I added a few white gelly roll pen highlights and then cut him out with the coordinating die.  For my background I cut a white panel 4" x 5 1/4" and stamped the circle in a muted lemon ink.  I stamped the flowers from the stamp set in a mid grey ink and coloured them with Promarkers.  I stamped the sentiment in the top left corner in black ink (I did try the mid grey ink first but it looked a little washed out so stamped over it with the black.  I added some scrap white card behind my panel with double sided tape and then adhered it to my card base, again using double sided tape.  The bunny was adhered over the circle with thin foam squares.  No embellishments but I really like it the way it is.  For the inside I cut another white panel 4" x 5 1/4" and repeated the stamping to mimic the front.  I added a secondary sentiment in the upper centre again using black ink.  The panel was added onto the card base with double sided tape.  This is about as CAS as I can get but I really like this design.  

I would like to enter my card into the following challenges:

AAA Cards challenge - sketch (I flipped it and rotated it)
As You Like It challenge - fussy or CAS (I like both options but I am getting more comfortable with CAS cards now and make them quite a lot)
Crafty Animals challenge - ATG must include an animal
Critter Crazy challenge - ATG with a featured critter
If You Give A Crafter A Cookie challenge - bunnies & eggs inspiration photo
I Love Promarkers challenge - ATG or no patterned paper
Papercraft challenges - Easter elegance
PINspirational challenge - Happy Easter optional inspiration photo
Stamping Sensations challenge - birds, animals, flowers and nature
The Four Seasons challenge - ATG spring optional mood board
The Paper Funday challenge - ATG optional twist things that begin with B (bunny)

I hope you will be able to join us for our 'CAS' challenge and I cannot wait to see your creations in our linky. Please leave some love for my fellow chicks - Leanne, Diane and Lori. Thank you so much for stopping by; I appreciate your lovely comments.

Love and hugs,

Card supplies:
Spellbinders - spring smiles stamp & die set
Promarkers
Avery Elle - painted backdrops stamp set - retired
Gina K Designs - lemon drop ink pad
Versafine Clair - morning mist ink pad
Versafine - onyx black ink pad
Limetree Crafts - 250gsm silky smooth white card - not currently available - they do have 300gsm bright white card available here
Heffy Doodle - alcohol marker friendly card - store now closed

Wednesday, 19 February 2025

Cards for All Seasons IG Hop - Week 4

Hello friends; I hope you're having a great week so far. I'm back today to share my card for this week's Cards for All Seasons IG hop organised by my lovely friend Kelly. We are now on Week 4 and this week our theme is 'follow your heart'. which means either use a heart somewhere on your project; which is super easy, or alternatively create a card with something that’s near to your heart.  A really fun theme and I can't wait to see what sparks your imagination.
I decided to go with something that's near to my heart and I chose my pets.  We have a cat called Willow who is 3 years old and a puppy called Wesley who is 10 months old and they are full of fun and mischief and keep me on my toes but I love them dearly.  I found this cute stamp set in my stash and I'm not sure I've ever used it but it was perfect for today's card.  I hope you like it.
Here is my card:
A closer look at the adorable image:
Plus I decorated the inside:
I began by stamping the image onto alcohol marker friendly card, coloured it with Promarkers and added some details with a white gelly roll pen.  I then used the coordinating die to cut it out.  I decided to have a kraft card base for a change and randomly stamped the two paw prints all over the front of the card base with kraft ink for a tone-on-tone look.  I went with a brown and orange colour scheme to compliment my image and cut a thin strip of orange card and also a strip of patterned paper and adhered them together with double sided tape.  I then added them directly onto the card base with double sided tape.  I die cut a white circle as a grounding area for my image.  I added the image onto the circle with foam squares and then the circle over the patterned paper with double sided tape.  I stamped the sentiment onto the same kraft card using acorn ink and die cut it with a banner die.  I adhered this under the image with foam squares.  I die cut a few hearts from the orange card and added them with liquid glue.  For the inside I cut a white panel 4" x 5 1/4' and added a strip of the patterned paper and a tiny strip of orange card along the left side with double sided tape.  I stamped 3 pawprints onto kraft card and used the coordinating dies to cut them out; I adhered them in the bottom left corner with liquid glue.  Finally I stamped the sentiment in the acorn ink in the centre of the panel.  The panel was added to my card base with double sided tape.  I really love this card and the image is just so cute.  

I would like to enter my card into the following challenges:

Addicted to Stamps & More challenge - make your mark (coloured with markers)
Crafty Animals challenge - ATG must include an animal
Crafty Catz challenge - ATG optional twist use a die
I Love Promarkers challenge - ATG or add some sparkle
Tic Tac Toe challenge - kraft card stock, die cut, ink/markers/coloured pencils

I hope you will pop over to Instagram and check out the hop; please use the hashtag #cardsforallseasonshop2025 to see all the gorgeous creations and also if you want to participate we will be able to find you. 

I'll be back in the morning with my card for the Krafty Chicks challenge so I hope you will pop back and check it out. Until then thank you so much for stopping by.

Love and hugs,

card ingredients:
MFT - forever friends stamp & die set - retired
MFT - friends forever stamp (for inside sentiment) - retired 
MFT - blueprints 27 (for banner die) - ? retired
MFT - tag builder blueprints 6 (for heart dies)
Promarkers
Basic Grey - basics white 6x6 paper pad - no longer available
VersaFine Clair - acorn ink pad
Gina K Designs - kraft ink pad
Heffy Doodle - alcohol marker friendly card (store now closed)
Crafter's Companion - kraft card stock 280gsm
Limetree Crafts - 250gsm silky smooth white card (currently not available)
orange card from stash