My Lovely Followers

Thursday, 6 June 2024

Krafty Chicks challenge #719 - Stamps

Good morning friends; it's Thursday so that means it's time for a new challenge over at Krafty Chicks challenge.  As it's the start of the month we are back to Week 1 which means our theme this week is 'Stamps', so we would like to see a stamp/digi on your project. 
It was my brother-in-law's birthday recently and today I'm sharing the card I made for him.  He took his cards away on holiday with him so didn't fuss too much, although most men prefer this anyway I find.  
Here is my card:
A close up of the image:
I decorated the inside:
I began by stamping the image onto alcohol marker friendly card and coloured it with my Promarkers.  I also added some puffy stuff to make the foam look dimensional.  I cut it into a square and added a brown mat behind.  I had already created the background for a different project but hadn't used it.  It was simply a white panel with some black and gold splatter over it.  I again matted it onto a brown panel and adhered it to my card base with double sided tape.  I wanted to add some interest so took a strip of patterned paper, added a brown mat panel and adhered it to my background along the left side of the card.  I attached the image panel over top with foam squares.  I stamped the sentiment in black ink and cut it into a rectangle before adding a brown mat behind.  The was added to the card with double sided tape.  In the same stamp set as the beer glasses were some label type images and smaller bottle top style stamps.  I stamped them onto white card, inked them with a brown ink pad.  I fussy cut the label and used a small circle punch to cut out the smaller ones.  I added the label with foam squares and the circles with liquid glue.  For the inside I cut a white panel, simply added a strip of the patterned paper to the very bottom and added a strip of brown card above.  I adhered this onto a brown mat panel and stamped the sentiment in the centre with black ink.  I added one of the small punched circles to the bottom right corner.  The whole panel was then adhered to my card base with double sided tape.  The finished card is 5" x 7".  

I would like to enter my card into the following challenges:

Allsorts challenge - lots of layers
Classic Design challenge - ATG optional twist masculine
CRAFT challenge - masculine
Make My Monday challenge - B is for ...... birthday, beer, brother-in-law, brown

I hope you will be able to join us for our 'stamps' challenge and I cannot wait to see your creations in our linky.  Please leave some love for my fellow chicks - LeanneDiane and Lori and also our guest designer Rachelle, who is with us for another month.  

Thanks for stopping by. 

Love and hugs, 
Card ingredients:
Apple Blossom - time for a beer stamp set - no longer available 
Clearly Besotted - happy birthday all - retired
Clearly Besotted Stamps - mini calligraphy - retired 
Woodware - tiny circle punch
DCWV - the natural stack 8"x8" cardstock pad - no longer available
Gina K Designs - charcoal brown card
Gina K Designs - warm cocoa ink pad
Versafine - onyx black ink pad
Promarkers
Inkylicious - fluffy puffy stuff

Wednesday, 5 June 2024

Mini Card Challenge IG Hop - Week 4

Hello friends and happy Wednesday.  I trust your week has been good so far.  I'm back to share my card for the final week of the Mini Card challenge IG Hop, which has been organised by my lovely friend Kelly. It's a chance to keep us occupied and our creativity flowing before the Summer 2024 Hop begins. 
This week we are challenging ourselves to use up old, forgotten and hoarded supplies (I'm sure we all have lots of these hiding in our cupboards) or use up some of those backgrounds you've created and put in a drawer.  You can choose to use 1, 2 or all 3 of the parameters.  I decided to use all 3 on my card and as we are using old, forgotten supplies, I thought I would go 'old-school' and make a layered, 6" x 6" card like I used to in the olden days! 
Here is my card:
A close up of the image:
I decorated the inside:
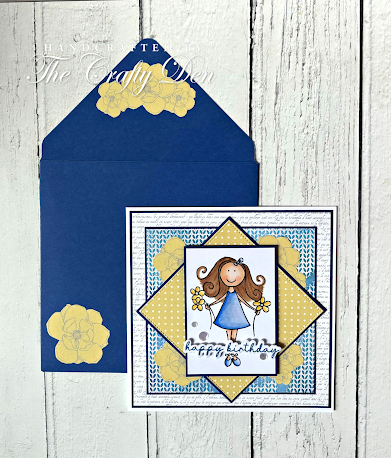
I also made my own envelope and decorated it:
I began by stamping my very old wooden block stamp from Elzybells (maybe 2008/09) onto alcohol marker friendly card and coloured it with my Promarkers.  I dug out a very old 6" x 6" paper pad (again from 2012) and matted the pieces onto navy card.  I used another embossed background which went a bit awry and distressed looking but most of it is covered by the patterned paper!  I fussy cut some of the yellow flowers from a sheet that I had already used as I thought they would be pretty decorations.  I made my own 6" x 6" card blank and added my layers with double sided tape.  I used a die to cut the yellow dotted paper so that it would have a decorative stitched edge.  I placed this in a diagonal position for some extra interest and this also meant I could tuck my flowers into the corners.  I added my coloured image in the centre and adhered it with foam squares.  I fussed about with various sentiments but then remembered I had just received a new set from Simon Says Stamp which had a matching die-set so I thought it would be perfect as it wouldn't hide too much of my image.  I stamped it in navy ink, die cut it out and added to my card with thin foam strips.  I did get a little ink on my image panel so added a couple of clear sequins to hide my boo-boo!  As a finishing touch I added some clear glaze into the centre of the flowers.  For the inside I cut a white panel and adhered it to a navy panel with double sided tape.  I added a strip of the yellow paper on the bottom and a thin strip of blue card.  I also tucked another yellow flower under the border with liquid glue.  I stamped my sentiment in black ink in the centre of the panel.  I adhered the whole panel to my card base with double sided tape.  I don't have any 6" x 6" envelopes any more so used my 1-2-3 punch board to make my own from navy card.  I decorated the front and the back flap with more of the fussy cut flowers.  It's very different to my more minimal style these days but I think it turned out really pretty. 

I would like to enter my card into the following challenges:

Allsorts challenge - lots of layers
Alphabet challenge - embossing wet or dry (my blue panel is heat embossed)
As You Like It challenge - embossing wet/dry (I love the look of heat embossing but I'm not very good at it.  My blue panel is embossed and again it looks a little distressed but I'll keep practising).  
Double D challenge - pick 3; old, new, borrowed, blue (old stamp, new birthday stamp, blue colour)
Everybody Art challenge - 3 patterned papers (script, dots and flowers cut from one sheet)
Make My Monday challenge - B is for...... birthday, blooms & blue
Pearly Sparkles challenge - one for the girls
Triple B challenge - include at least one bird, bloom or butterfly
Try It On Tuesday challenge - emboss it (my blue panel is embossed)
Unicorn challenge - embossing (my blue panel is embossed)
We Love Stamping challenge - fabulous florals/anything goes

If you would like to follow the hop over on Instagram please use the hashtag #minicardchallenges to find us or alternatively visit my profile and you will find the list of participants on my post.  We would love it if you would give the mixed up challenges a try and again use the hashtag and we will find your projects.  I'm sad that this particular hop is coming to an end but it won't be long before the Summer hop begins.  

I'll be back tomorrow with my card for the Krafty Chicks challenge but until then enjoy the rest of your day and thank you for stopping by. 

Love and hugs,

Card ingredients:
Elzybells Stamps - 16.002F (not sure of the name) - sadly closed many years ago
Promarkers
Teresa Collins - everyday moments 6" x 6" paper pad
Gina K Designs - close knit background stamp 
Gina K Designs - master layouts 3 (for square dies)
Gina K Designs - blue denim ink pad
Crafts UK Limited - 12" x 12" 250gsm white card
Heffy Doodle - alcohol marker friendly card - so sad to hear they are closing soon
Heffy Doodle - adhesive foam strips
Tonic Studios - Nuvo crystal glaze

Tuesday, 4 June 2024

Christmas Kickstart challenge #87 - it's a gift

Good morning lovely friends; I hope you are doing ok and having a good start to your week.  I am honoured to be a guest elf over at the Christmas Kickstart challenge this month and the theme is 'it's a gift'.  I am so happy to be building up my stash of Christmas cards nice and early this year after only making about 6 in total last year.  
For my card today I grabbed another LOTV image as they are so cute but always lovely to colour.  I used a simple layout but one that I think is pleasing to the eye.  
Here is my card:
A close up of the image:
Plus I decorated the inside:
I began by stamping the cute reindeer image onto alcohol marker friendly card, coloured him with Promarkers and added some highlights with a white gel pen.  I was feeling too lazy to fussy cut him out so just cut a rectangle which I matted onto red card.  I wrapped some red twine around the panel and tied it into a bow and then stamped my sentiment below it with black ink.  For my background I used a background stamp which I white heat embossed.  The embossing was a little patchy but I think it gave it a cool distressed feel.  I decided to ink blend some brown ink over the embossing to colour coordinate with my reindeer.  I die cut this panel using a scalloped die and again matted it onto red card.  The background panel was added to my card base with double sided tape and the image panel was added with foam squares.  I didn't add any embellishments as I liked it as it was.  For the inside I cut a white panel and matted it onto red card.  I stamped the sentiment in black ink and stamped the reindeer at the bottom in brown ink.  I adhered this panel to the card base with double sided tape.  A fairly simple card but I think it looks adorable.  

I would like to enter my card into the following challenges:

Allsorts challenge - lots of layers
Alphabet challenge - E is for embossing (my background is heat embossed)
As You Like It challenge - embossing wet/heat or dry (I love the look of heat embossing but don't do it very often as I always seem to mess it up.  I embossed my BG on this card and it looks decidedly distressed but I think it works. I need to practice more!
CRAFT challenge - Christmas
Crafty Animals challenge - ATG must include an animal
Critter Crazy challenge - ATG with a featured critter
I Love Promarkers challenge - ATG/tropical vibes
Jingle Belles challenge - tic tac toe (embossing/red or green/die cuts)
Merry Little Christmas challenge - anything Christmas goes
Peace on Earth Christmas challenge - anything Christmas goes
The Holly & Ivy Christmas challenge - anything Christmas goes
Try It On Tuesday challenge - emboss it (I heat embossed my background)
Unicorn challenge - embossing (I heat embossed my background)

I hope you can join in with the challenge; I can't wait to see your creations in the linky.  Jo does a great job running the blog singlehandedly (with just her guest elves) so please pop over and check out her gorgeous card and leave her some love too.  

I'll be back tomorrow with the final card for the Mini Card challenge IG Hop so if you have time please pop back and check it out.  Until then enjoy the rest of your day. 

Love and hugs, 

Card ingredients:
Promarkers
Gina K Designs - close knit BG stamp
Gina K Designs - ink pads - kraft and warm cocoa
MFT - blueprints 27 (for scalloped die)
Clearly Besotted Stamps - feeling sentimental (for outside sentiment) - retired
Paula Pascual - Christmas messages (for inside sentiment) - retired
Versafine - onyx black ink pad
red card and twine from stash

Sunday, 2 June 2024

Red, white & blue card

Hello lovely friends; I hope you're having a great Sunday.  It's really warm and sunny here today and even though I don't like sunbathing or sitting out in it for too long, it's really nice to have the dry and sunny weather isn't it?  It makes everyone feel so much happier (plus I can dry my clothes on the line lol).  

Anyway enough waffling from me; I'm sharing a card I made especially to fit in with a few fun CAS challenges that are around at the moment.  Not 100% sure about it but my son liked it so that's nice.  
Here is my card:
A closer look:
Plus I decorated the inside:
I began by die cutting the balloons from white card.  I grabbed some red and blue ink and a couple of stencils and blending the ink onto the die cuts.  I coloured the 'strings' by blending on the ink.  I already had the 'hugs' word die cut from a previous project so wanted to use that so I just stamped the 'birthday' word in red ink and trimmed it into a rectangle.  I cut a white panel 4" x 5 1/4" and added it to my card base with foam tape.  All the other elements were arranged and added with liquid glue.  No embellishments as I wanted to keep it clean and simple.  For the inside I cut another white panel, stencilling some stripes on the bottom and added another balloon with liquid glue.  I stamped a sentiment into the centre with black ink and then added the panel to my card base with double sided tape.  Not a colour combo I would normally use but I think it turned out cool.  I hope you like it.

I would like to enter my card into the following challenges:

Addicted to CAS challenge - code word: Balloons (10 challenges max)
CAS on Friday challenge - code word: Hugs
Color Throwdown challenge - red, blue & white
Crafty Catz challenge - ATG optional twist use a stencil
Double D challenge - polka dots
Everybody Art challenge - circles and/or stripes
Sweet Stampin' challenge - clean and simple

I hope you enjoy the rest of your Sunday.  I appreciate you stopping by and leaving me lovely comments. 

Love and hugs, 

Card ingredients:
MFT - birthday balloon die - retired
MFT - sending big hugs coverplate (for hugs die cut)
MFT - inside and out birthday greetings (for inside sentiment)
Uniko Stamps - everyday sentiments (for birthday word)
Gina K Designs - ink pads - red hot and blue raspberry
Rangerour town stencil (for the stripes)
The Crafters Workshop - punchinella stencil (for stars and dots) -  no longer available
Versafine - onyx black ink

Saturday, 1 June 2024

AAA Birthday challenge #62 - Cute

Good morning lovely friends ; can you believe it's already the 1st of June.  I don't know where the months are going, it only seems like last week that I was welcoming May lol!  I'm here this morning for the start of a brand new challenge over at the AAA Birthday challenge. This month I am the hostess and I've chosen 'cute' as our theme as I'm a sucker for cute images.  
I recently came across my action wobblers (which I couldn't find for ages) so decided this would be the perfect time to use them.  I used a LOTV image again this month as they are so cute and adorable. 
Here is my card:
A close look at the image:
I decorated the inside:
Here's a short 10 sec video of the wobbler in action:

I began by stamping the 2 adorable LOTV images onto alcohol marker friendly card.  I coloured them with Promarkers and then fussy cut them out.  I cut a white panel 4"x 5 1/4" and added a scrap of green gingham paper that went well with my image to the bottom half.  I added a strip of plain green card above the paper and also a strip of pink card to the very top of the panel.  I die cut the word happy from the white card and ink blended it with pink ink.  I also die cut a pre-printed sentiment strip.  I added the action wobbler behind the image and then attached it to the card in the white space on my card.  I added the happy word and strip sentiment onto the patterned paper towards the right hand side using liquid glue.  I finished the front of my card with some pastel colour pearls.  For the inside I again cut a white panel 4" x 5 1/4" and added another piece of the patterned paper to the bottom portion and added a plain green strip above.  I also added the second image I had coloured in the lower left corner.  I must have gotten distracted because I completely forgot to stamp a sentiment inside, but can do that when I come to send it out.  I think the card turned out super cute.  

I would like to enter my card into the following challenges:

Critter Crazy challenge - ATG with a featured critter
Everybody Art challenge - circles and/or stripes
I Love Promarkers challenge - ATG/tropical vibes
Incy Wincy Designs challenge - winter snow and/or summer flowers
Papercraft challenges - flower power
Pearly Sparkles challenge - one for the girls
Shopping Our Stash challenge - how does your garden grow (13 challenges max)

The Design Team have created amazing cards as always so please pop over to the blog and check them out and perhaps leave them some love on their personal blogs.   

I hope you will be able to join in with my challenge this month but don't forget it has to be birthday themed.  I can't wait to see your creations in the linky.

Enjoy the rest of your day and thank you so much for stopping by.

Love and hugs, 

Card ingredients:
Promarkers
Gina K Designs - sentiment strips dies
Gina K Designs - rainbow pearl mix
Hampton Art - mini action wobblers
gingham paper and coloured card from stash

Thursday, 30 May 2024

Krafty Chicks challenge #718 - ATG

Good morning friends; it's Thursday so that means it's time for a new challenge over at Krafty Chicks challenge.  As it's a 5 week month our theme this week is Anything Goes, so you can create whatever you like.  
It was my brother-in-law's birthday last week so needed a masculine card for my boys to give him.  I went graphic and bold for my card.  I hope you like it.
Here is my card:
A closer look at the stamping:
I decorated the inside:
Once I had decided on my products, I think this was one of the fastest cards I have ever made!!  I began by stamping the background in black ink onto a white card panel.  It is a small background stamp so I turned it sideways and stamped it twice to make a complete background for my panel.  I cut the width of my panel slightly smaller so that I could add a strip of light green card down the left hand side and the whole panel was added to the card base with double sided tape.  I used 3 separate stamp sets to create my sentiment but as they were all the same font they look like they were meant to be together.  I stamped the sentiment in black ink and cut it with a stitched die and matted it onto a piece of the light green card.  This was added onto the card with foam squares.  I found some enamel dots (trying to use up some older stuff) in almost the exact same colour green so added a few around the sentiment.  For the inside I cut a white panel and stamped the background stamp at the bottom and added a strip of green card to add a decorative edge.  I stamped the sentiment in the centre of the panel in black ink.  I added the panel to the card base with double sided tape.  A really simple card but quite striking and although not my usual colour scheme I think it works.  

I would like to enter my card into the following challenges:

Classic Design challenge - ATG optional masculine
Everybody Art challenge - circles and/or stripes (I have lines and dots - please delete me if not appropriate)
Tic Tac Toe challenge - #248 - masculine/free/masculine sentiment

I hope you will be able to join us for our 'Anything Goes' challenge and I cannot wait to see your creations in our linky.  Please leave some love for my fellow chicks - LeanneDiane and Lori and also our guest designer for May, Rachelle

Thanks for stopping by. 

Love and hugs, 
Card Ingredients:
Uniko Stamps - everyday family (for the uncle word)
Uniko Stamps - everyday sentiments (for the birthday word)
Uniko Stamps - everyday love sentiments (for the happy word)
Uniko Stamps - birthday wishes (for inside sentiment)
Versafine - onyx black ink 
green card from my stash

Wednesday, 29 May 2024

Mini Card Challenge IG Hop - Week 3

Hello friends and happy Wednesday.  I trust your week has been good so far.  I'm back to share this week's card for the Mini Card challenge IG Hop, which has been organised by my lovely friend Kelly. It's a chance to keep us occupied and our creativity flowing before the Summer 2024 Hop begins. 

This week we want you to 'tell us a secret' which means we want to see hidden elements. surprise reveals etc.  I decided to make a wiper card since I've never made one before.  I did watch a few tutorials before I started but even so I struggled to get the mechanism to work so I went to my tried and tested guru Sam Calcott and she is so good at explaining these interactive cards that I got it right away.  I know it's not super technical but sometimes the simpler things make the less sense lol!  Anyway I finally got it and my wiper worked *yay*.  
Here is my card:
A view with the wiper mechanism up:
A closer look at the images:
I decorated the back as there is no inside:

I took a short video...it's not the best but you can see the mechanism popping up!


I began by following a tutorial by Beata on Splitcoaststampers here but I don't know why but I really struggled to get my mechanism to work.  I jumped over to YouTube and watched a video by Sam Calcott here and it finally clicked.  There was nothing wrong with Beata's tutorial but Sam has a really good way of explaining things and I always watch her videos when I need to do a complicated interactive card.  I made an A2 size card as that was Beata's original tutorial.  I was originally going to use a speech bubble as my wiper pop up but didn't like it but still used it but cut off the pointy bit to leave an oval instead.  I added a sentiment onto the pop up and a paw print and also added a small piece of the patterned paper to make it look a little prettier.  After finally getting my card base together I began working on the fun bit of decorating.  I love this paper pad from Gina K designs so used that as my background, cut a slightly larger black mat panel and adhered them to the card with double sided tape.  I stamped the cute images onto alcohol marker friendly card and coloured them with Promarkers (my editing programme make my blends look really harsh but they are not like that in real life, honest!).  I used the matching dies to cut them out.  I didn't want the images just floating on the background so used a heart border die, which comes in 2 pieces, coloured the plain piece with the same marker as I used on the jumper of my image and adhered the cut out piece over top with liquid glue.  I added the images with foam squares.  I decided to add a generic image to the front which matched the images but it was slightly too long for my card so I simply cut it in half and placed them onto the card with liquid glue.  I found a few gold hearts in the back of the stamp set that I must of cut previously so added 3 of them with liquid glue as a finishing touch.  For the back of the card I added a white panel which was matted onto a black panel.  Before adding it to the card base I stamped a sentiment in the centre of the panel with black ink and a strip of the patterned paper to the bottom.  I stamped and coloured an extra dog and adhered that to the bottom right with liquid glue.  I also had an extra heart that I had cut off from the front so also added that to the bottom left with liquid glue.  A really fun card and it will fold down flat and fit into a normal envelope, the same as other dimensional cards I make.  

I would like to enter my card into the following challenges:

AAA Colourful challenge - colourboard #4
Allsorts challenge - ATG option blast from the past (most of my products are very old/retired)
Creative Creases challenge - ATG with a fun fold
 
I Love Promarkers challenge - ATG option tropical vibes

If you would like to follow the hop over on Instagram please use the hashtag #minicardchallenges to find us or alternatively visit my profile and you will find the list of participants on my post.  We would love it if you would give the mixed up challenges a try and again use the hashtag and we will find your projects. 

I'll be back tomorrow with my card for the Krafty Chicks challenge but until then enjoy the rest of your day and thank you for stopping by. 

Love and hugs,

Card ingredients:
MFT - new best friend stamp & matching dies (for images and sentiment on pop up) - retired
MFT - puppy kisses stamp set (for sentiment on back) - retired
MFT - friends furever stamp (for sentiment on front) - retired
MFT - layered heart border dies (retired)
SSS - talk bubbles die (although I altered it) (no longer available)
Gina K Designs - autumn splendor paper pad
Gina K Designs - warm cocoa ink pad (to stamp the paw print)
Limetree Crafts - 250gsm silky smooth card 
Hobbycraft - A4 black card
Promarkers
Versafine - onyx black ink pad