My Lovely Followers

Wednesday, 17 April 2024

Spring Into Card Making IG Hop - Week 6

Hello friends; I hope you're having a great day.  I'm back to share this week's card for the Spring Into Card Making IG Hop, which has been organised by my lovely friend Kelly.  Each week we will be sharing a themed card focusing on the joys of spring.  If our hop inspires you please use the hashtag #2024springintocardmakinghop to join in the fun.  
This week's inspiration prompt is 'spring into action' so we want to see something interactive on your cards this week; even if it's just an action wobbler.  If interactive cards are not your things we would love to see your spring themed cards.  I originally made a card with an action wobbler but I didn't love it so decided to make another; the second card is a tent style card with a swinging action.  I hope you like it.
Here is my card:

A closer look at the cute images:

There is no inside as such so I decorated the back:
It's not a very good photo but I wanted to show you the side view:

The basic size of the card is a regular US A2 (4 1/4" x 5 1/2") so I made my card base from white card and then cut a smaller piece 4 1/4" x 2" to create the 'W' for the inside using my score board to score at every 1/2" (I hope that makes sense).  Before sticking everything together I cut a rectangle from the front of the card so that I could make my scene.  I also created a background piece using cloud and grass stencils and adhered it to the inside of the card with double sided tape.  I stamped 2 monkeys, some branches and some bananas and coloured them with Promarkers; I then used the matching dies to cut them out.  I know you can buy the swinging mechanisms but to be honest I very rarely make these types of cards so had a go at making my own.  I cut a thin strip of acetate and punched a small hole in the top.  I die cut 6 smaller circles from white card and adhered them together with liquid glue.  By placing the smaller circles inside the acetate circle will enable my monkey to swing.  To keep it all together I punched 2 larger white circles and enclosed it all together.  I did have to trim my acetate a little to enable it to swing freely and also so that it wouldn't show behind the monkey.  I cut some green card using a scalloped die and added this to the top of the rectangle on the inside so that it would hide my mechanism.  I'm sorry if my instructions are not clear; I didn't think to take step by step photos as I wasn't sure it would even work lol!  I'm sure if you check Pinterest you will find some instructions there.  I added my branches, monkeys and bananas and then stamped my sentiment (which was made up of 2 different stamp sets).  As there is no traditional inside of the card I decorated the back with another stencilled panel and also added another monkey.  I haven't added a sentiment yet but will do that when I know who I am sending the card to.  I adhered the panel with double sided tape.  I then finished the card by adding the 'W' to each side of the card (using extra strong tape) to make it stand up (although it is a little bowed as I didn't take into account the extra bulk of the swing mechanism).  I didn't feel the need to add any embellishments as there was so much going on.  I really hope you like it.  I did take a short video and if you want to see it swing please pop over to my Instagram. 

I would like to enter my card into the following challenges:

As You Like It challenge - cute or floral (I love cute animal images and they suit all ages)
Creative Creases challenge - ATG with a fun fold
CRAFT challenge - inspired by a movie (jungle book)
Crafty Animals challenge - ATG must include an animal
Crafty Catz challenge - ATG option any cute critter
Creative Moments challenge - cute and cuddly
Critter Crazy challenge - ATG with a featured critter
Fab 'n' Funky challenge - add a sentiment
I love Promarkers challenge - ATG option shapes
Incy Wincy Designs challenge - inspired by a song/book or movie (jungle book)
Inkspirational challenge - word prompt FOLD
Simply Create Too challenge - more than one fold
Simon Says Stamp Monday challenge - make your own background
Stencil Fun challenge - Anything stencil goes option spring/flowers
The Cutie Pie challenge - simply cuties
Tic Tac Toe challenge - stencil/die cut/critter
Tic Tac Toe Challenge #245

I would love it if you would pop over to Instagram and see the amazing work by all the other crafters taking part in the hop.  Please use the hashtag #2024springintocardmakinghop to find us and also so that we can find your creation if you are inspired to take part.  

I'll be back again with you tomorrow with my card for the Krafty Chicks challenge so please pop by and check it out.  As always I appreciate the comments you leave and thank you so much for stopping by. 

Love and hugs, 


card ingredients:
Heffy Doodle - Chimply the best stamp & die set
Gina K Designs - Easter blessing stamp set (for part of sentiment)
Gina K Designs - ink pads - sea glass and grass green
MFT - mini cloud edges stencil
Spellbinders - standard circles large dies (for larger circles in my mechanism)
Clearly Besotted Stamps - scalloped edges die collection
Promarkers
Versafine - onyx black ink pad
green card from stash

Thursday, 11 April 2024

Krafty Chicks challenge #711 - Christmas

Hello friends; I hope you're having a great week.  I'm here today to share my DT card for this week's Krafty Chicks challenge.  As we are on Week 2 we are looking for all your Christmas or holiday themed creations.  

I went for a traditional style card this time and used some silhouette stamps against an ink blended background.  Here is my card:
a closer look at my scene:
I decorated the inside as always:
I began by cutting my panel of white card to 4" x 5 1/4" (although I did trim it down slightly later on).  I created some masks for the moon and under the trees/houses so that they would remain white (to create the curved edge I traced along the edge of the stamp so that my mask would match perfectly).  I took 4 ink colours and created my ink blended night sky.  Once the blend has dried a little I removed the masks.   I then took the silhouette stamps and stamped them multiple times (using my Misti) with black ink.  I took the sentiments from the same stamp set and also stamped them in black ink more towards the right hand side of the white portion of the card.  I added some white highlights to my Santa & sleigh and also some snow (or stars) to the background with a white gelly roll pen.  I added the white panel to a black mat with double sided tape and then added this to the card blank with foam tape.  For the inside I stamped the trees/houses border at the very bottom of my panel and added a sentiment in black ink.  Again this was matted with a black panel and added to my card base with double sided tape.  I'm really happy with my ink blending and really pleased with the finished card.  I hope you like it too.  

I'd like to enter my card into the following challenges:

ABC Christmas challenge - I is for inky (I ink blended my background)
Christmas Craft Creations challenge - non traditional colours
Christmas Kickstart challenge - Santa and his sidekicks
CRAFT challenge - inspired by a movie (Santa Claus the movie)
Merry Little Christmas challenge - anything Christmas goes
Peace on Earth Christmas challenge - mood board or anything Christmas goes
Sparkles Christmas challenge - non traditional colours
The Holly & The Ivy challenge - anything Christmas goes

I hope you will be able to join us for our 'Christmas' challenge and I cannot wait to see your creations in our linky.  Please leave some love for my fellow chicks - LeanneDiane and Lori and also our guest designer for April, Rachelle

Thanks for stopping by. 

Love and hugs, 
Card ingredients:
Gina K Designs - ink pads - plum punch, tranquil teal, blue denim, in the navy
Gina K Designs - masking magic sheets
Spellbinders - standard circles large dies (for moon mask)
Paula Pascual - Christmas messages (for inside sentiment)
Versafine - onyx black ink

Wednesday, 10 April 2024

Spring Into Card Making IG Hop - Week 5

Hello friends; I hope you're having a great day.  I'm back to share this week's card for the Spring Into Card Making IG Hop, which has been organised by my lovely friend Kelly.  Each week we will be sharing a themed card focusing on the joys of spring.  If our hop inspires you please use the hashtag #2024springintocardmakinghop to join in the fun.  
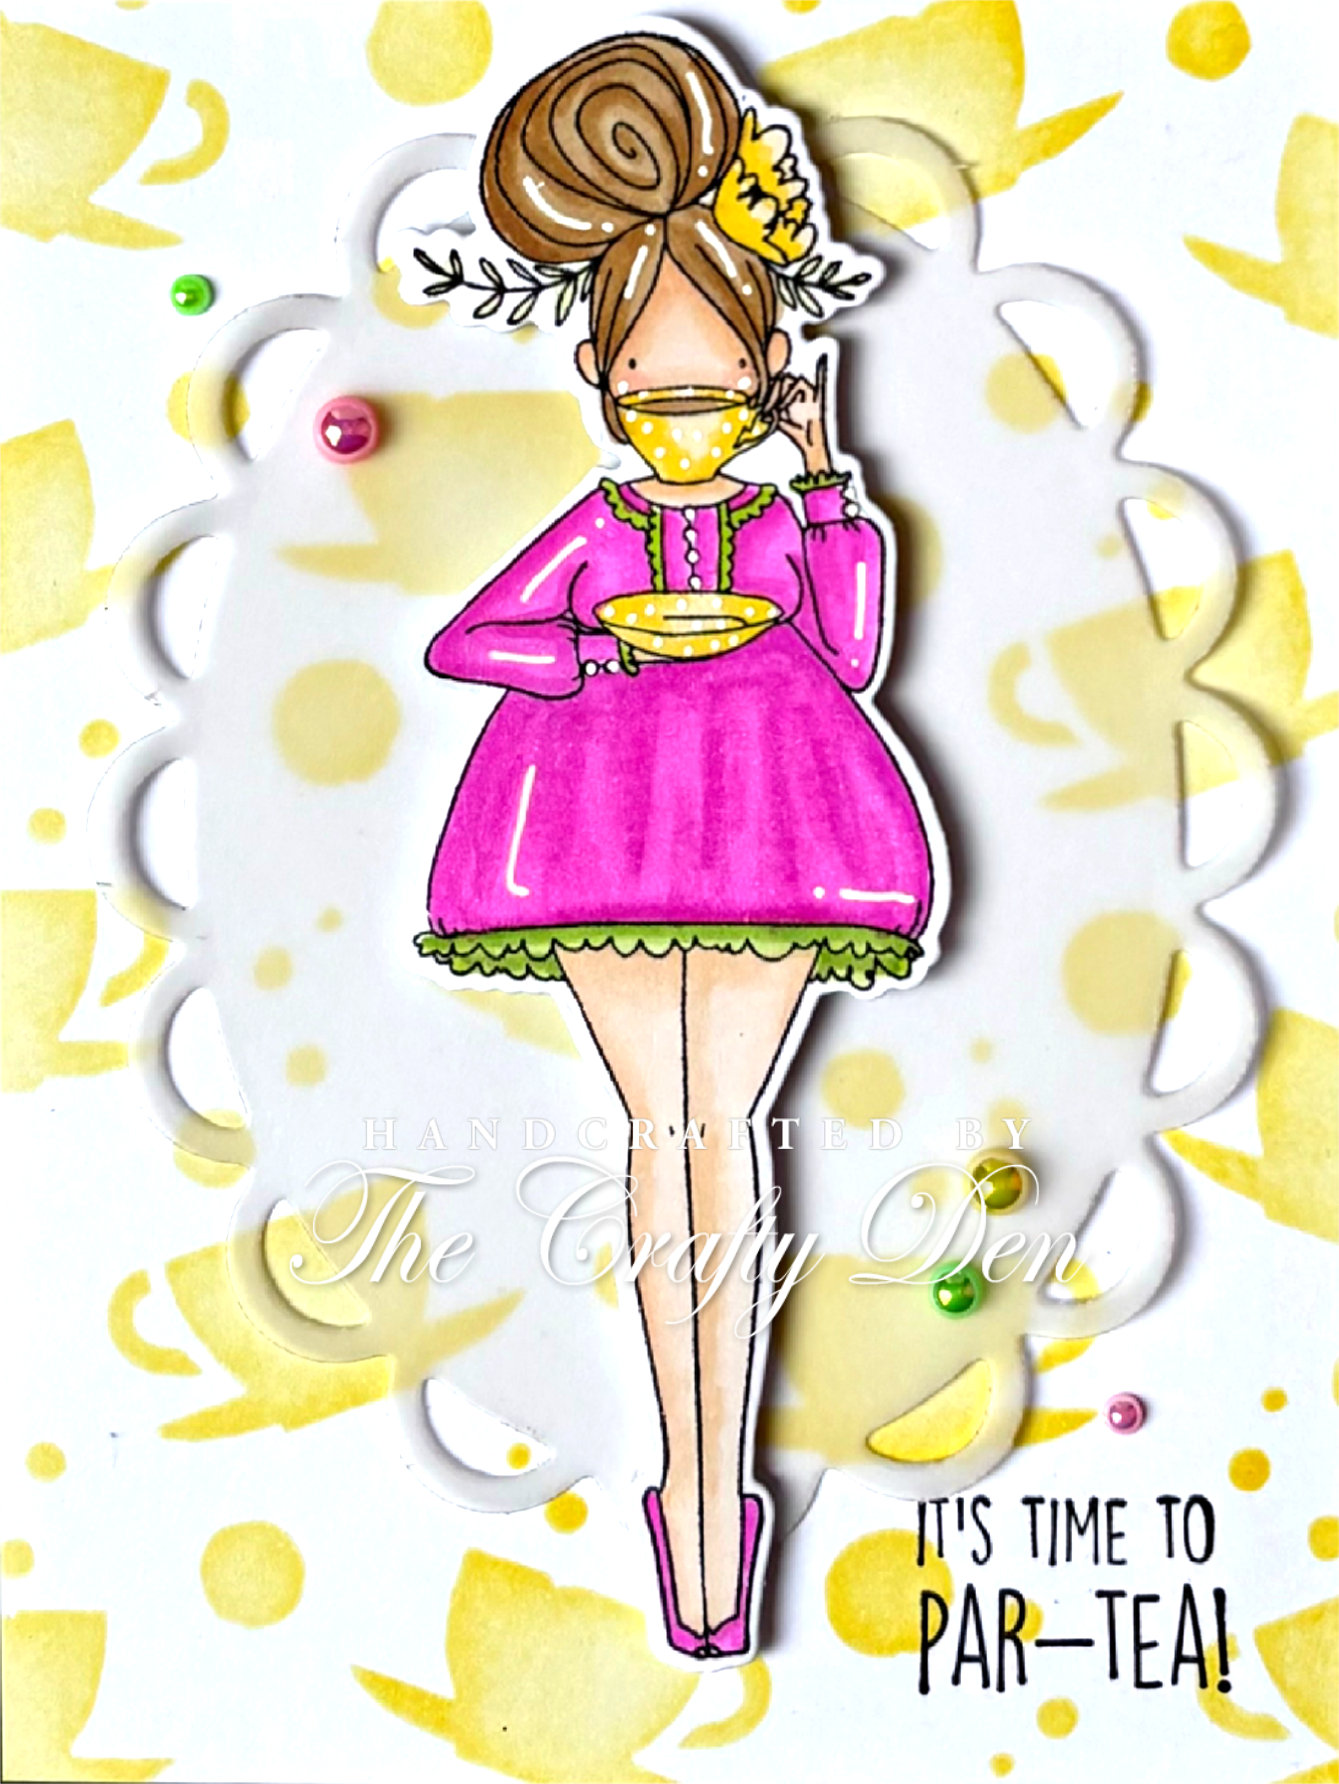
This week our inspiration is 'tea party' so grab all your stamps and dies with a tea theme and join in the fun.  I love this image and have used it quite a few times before but it was perfect for this week's theme.  
Here is my card:
a close up of the image:
plus I decorated the inside:
I began by cutting a white panel 3 7/8" x 5 1/8" and using the fun teacup stencil and some yellow ink created my background.  I matted this onto a black panel cut to 4" x 5 1/4".  I stamped the girl image and coloured her with Promarkers (+ 1 tri-blend marker) before using the matching die to cut her out.  I added some white highlights with a gelly roll pen.  I used a die to cut a lacey oval from vellum and added my image on top with foam squares; this was then adhered to the panel with liquid glue (making sure to only add it behind the image so that it wouldn't show through the vellum).  I stamped the sentiment in the lower right corner in black ink.  I finished with a few pastel pearls.  For the inside I masked a small portion at the bottom of the white panel and used the same stencil and ink to create a coordinating border.  I stamped a sentiment in black ink in the centre.  Once again I matted the panel onto a black panel and added it to the card base with double sided tape.  A fairly simple, bright and colourful card.

I would like to add my card into the following challenges:

Addicted to Stamps & More challenge - die cut and/or stencil (I used both)
Color Throwdown challenge - pink/green/yellow
Dream Valley challenge - spring colours
Fab 'n' Funky challenge - add a sentiment
Get Creative challenge - April Fool's Day (use a joke or punny sentiment)
I love Promarkers challenge - ATG option add a button
Inkspirational challenge - fold (I attempted to add folds to the dress)
Inspired By challenge - umbrellas (I was inspired by the colours)
Stamping Sensations challenge - spring mood board (inspired by the colours)
Stencil Fun challenge - must use a stencil option spring/flowers
Tic Tac Toe challenge - spring colours/free/stencil

I would love it if you would pop over to Instagram and see the amazing work by all the other crafters taking part in the hop.  Please use the hashtag #2024springintocardmakinghop to find us and also so that we can find your creation if you are inspired to take part.  

I'll be back again with you tomorrow with my card for the Krafty Chicks challenge so please pop by and check it out.  As always I appreciate the comments you leave and thank you so much for stopping by. 

Love and hugs, 

Card ingredients:
Stamping Bella - curvy girl loves tea
Visible Image - tea party stencil
Spellbinders - lacey oval dies
Promarkers (+ 1 tri-blend marker)
Clearly Besotted Stamps - simply said birthday (for inside sentiment)
Gina K Designs - wild dandelion ink pad
Gina K Designs - pearl mix - rainbow
Stampin' Up! - card stock vellum
Versafine - onyx black ink pad
Hobbycraft - A4 luxury black card
Memento - tuxedo black ink pad

Tuesday, 9 April 2024

Birthday card for Mother

Hello friends; I hope you've had a great start to your week.  The weather here in South Wales has been awful, so much rain and really windy but we've been lucky compared to some areas of the country, although it does seem that we've had rain for 10 years lol!  

It was my lovely mother's birthday last week so I thought I would share the card I made for her.  I went for a shabby chic vibe with muted colours.  I hope you like it.  
Here is my card:
a closer look at the images:
I decorated the inside:
I began by stamping the images in a soft beige ink and coloured them in muted colours of Promarkers.  I used the matching dies to cut them out.  I cut a piece of white card 4 3/4" x 6 3/4" and used an embossing folder to add some texture.  I matted the white panel onto a slightly larger pink panel with double sided tape.  I die cut a postage stamp panel and cut it up to make individual postage stamps.  I used my Promarkers to colour the edges, stamped a script background stamp over the postage stamps and also used a distressed background stamp to add some 'franking' marks to my postage stamps.  I also stamped some postage value and postage word stamps in black ink.  I added my images with foam squares and also added the postage stamps to my panel with foam squares.  I die cut a stitched strip banner and stamped my greeting in black ink; this was also added to the panel with foam squares (lots of dimension as I knew I would be hand delivering my card).  I adhered the panel to my card base with double sided tape and finished off with some gold pearls.  For the inside I added the same script background just around the edges of my panel and stamped my sentiment in the centre with black ink (I didn't realise it was off centre until now lol!).  As I had a few images left over I added them in a cluster in the bottom left corner with liquid glue.  I again matted the white panel onto pink card and adhered this to the card base with double sided tape.  I don't normally do shabby chic/vintage style cards but I'm happy with the finished result and most importantly my mother loved it.  The finished card is 5" x 7".

I would like to enter my card into the following challenges:

Addicted to Stamps & More challenge - die cuts and/or stencils
A Place to Start challenge - ATG optional twist add one or more flowers
Beautiful Blossoms challenge - anything floral goes optional mood board
Can You Handle the Pressure challenge - must use an embossing folder optional twist - birds
My Time to Craft challenge - butterflies and/or dragonflies
Sweet Stampin' challenge - birthday girls
Triple B challenge - must include at least one bird, butterfly or blooms
Unicorn challenge - use a die

I hope you enjoy the rest of your day.  I am so grateful for all the visits and comments on my blog.  I'll be back again tomorrow so hopefully you will be able to pop back again.  

Love and hugs, 

Card ingredients:
Gina K Designs - vintage summer stamp & die set
Gina K Designs - Master Layouts 14 
Gina K Designs - spring friends stamp set (for postage values and words)
Gina K Designs - lovely lace stamp set (for main sentiment)
Gina K Designs - ink pad - sandy beach
Promarkers
Honey Bee Stamps - Inside: birthday sentiments
MFT - romantic script background stamp
Inkylicious - worn paint background stamp (for 'franking' marks)
Versafine - onyx black ink pad
pink card from stash

Thursday, 4 April 2024

Krafty Chicks Challenge #710 - stamps

Hello friends; I hope you're having a great week so far.  I'm back to share my card for this week's Krafty Chicks challenge.  As it's the start of the month we are back to Week 1 which is 'stamps' so we would like to see a stamp/digi on your project. 
I was my mother's birthday yesterday so this is the card I made for my sons to give to her using a new stamp set.  Here is my card:
a closer look at the cute image:
plus I decorated the inside:
I began by creating my shaped card base.  I took a piece of 12"x12" card and folded it in half and placed the largest hexagonal die slightly over the fold of the card and ran it through my die cutting machine.  My card was 250gsm so it cut through the two layers without any issue.  I then took the next size die and cut it from some hot pink card and the next size down from patterned paper.  I then cut another pink panel with a slightly smaller die and used the next size down to cut out my image.  At this point I felt the margins between the dies was too large so using my paper trimmer I made the pink panels a little smaller.  I coloured the image with Promarkers and added some highlights with a white gel pen.  I adhered each of the layers together with double sided tape; adding the largest one to the card base with double sided tape also.  For the image panel I used foam tape for some extra dimension.  I stamped the sentiment in black ink onto white card and die cut it out with a small circle.  I used a slightly larger circle to cut out a pink mat layer and adhered them together with double sided tape.  This is adhered onto the edge of the image panel with more double sided tape.  (In case you were wondering, I live in the South Wales valleys and we use Mam in the same way as you would use Mom/Mum.  When my nephew was born he used to copy us and call his grandmother Mam and it just stuck for all the grandchildren).  For the inside I cut the same two largest panels, one from pink and one from white, again trimming the pink one down a little.  I stamped the sentiment in the centre and a portion of the image in a light grey ink and then adhered the panels with double sided tape.  This was then added to the card base with double sided tape.  I really like the different card shape and it was simple to make, even with all the fussing of cutting down the layers, but at least they were straight edges lol).  I hope you like it.  The finished card size is approximately 5 1/4" x 6 1/2" so I had to make a custom envelope using my envelope punch board.  

I would like to enter my card into the following challenges:

Addicted to Stamps & More challenge - die cut and/or stencils
A Place To Start challenge - ATG option add one or more flowers
As You Like It challenge - cute or floral (I love both but I think I reach for the cute images more often)
Beautiful Blossoms challenge - anything floral goes
Classic Design challenge - ATG option 4 legged friends
Crafty Animals challenge - must include an animal
Critter Crazy challenge - ATG with a featured critter
Double D challenge - cute little animals
I Love Promarkers challenge - ATG option add a button
Sweet Stampin' challenge - birthday girls 
The Sisterhood of Crafters challenge - bunnies and/or chicks
Triple B challenge - must include birds, butterflies or blooms 

I hope you will be able to join us for our 'stamps' challenge and I cannot wait to see your creations in our linky.  Please leave some love for my fellow chicks - LeanneDiane and Lori and also our guest designer for April, Rachelle

Thanks for stopping by. 

Love and hugs, 
Promarkers
Clearly Besotted Stamps - happy birthday all (retired)
Honey Bee Stamps - inside: birthday sentiments
Tonic Studios - circles layering basics dies
Gina K Designs - soft stone ink pad
Versafine - onyx black ink pad
Memento - tuxedo black ink pad
pink card from stash
Hexagon dies - I bought them from a de-stash site but didn't realise they were not branded

Wednesday, 3 April 2024

Spring Into Card Making IG Hop - week 4

Hello my lovely friends and happy Hump Day.  It's Week 4 of the Spring Into Card Making IG Hop organised by my lovely friend Kelly and this time we are all about spring.  Each week we will be sharing a themed card focusing on the joys of spring.  If our hop inspires you please use the hashtag #2024springintocardmakinghop to join in the fun.  
This week our inspiration prompt is 'April showers bring'.  You can create anything you like whatever this photo conjures up for you.  I went the obvious route (as I was running late with my card) and my card is April showers bring May flowers.  Here is my card:
A close up of my cute images:
As always I decorated the inside:
I began by stamping the umbrellas onto alcohol marker friendly card and coloured them with Promarkers, adding a few highlights with a white gelly roll pen.  I used the matching dies to cut them out (I also cut some extra umbrellas in white card so that I could layer them up for extra dimension).  I die cut 6 of the tiny flowers from 2 shades of purple cardstock and for the raindrops I coloured a white piece of card with a very light grey Promarker and cut 3 small and 3 large.  I cut a panel of lilac dotted paper to 4" x 5 1/4" and die cut a scalloped rectangle from white card.  I stamped my sentiment in black ink.  I added the patterned paper to the card base with double sided tape and the scalloped rectangle was adhered with foam tape.  I arranged the umbrellas, placed the flowers on top and added the raindrops all with liquid glue.  I added a dot of white gelly roll pen to the centres of the flowers and also added some shimmer pen over the raindrops but it's difficult to tell in the photos.  For the inside I cut a piece of white card 4" x 5 1/4" and took two strips of patterned paper cut to 4" x 1" and added them to the top and bottom of the panel with double sided tape.  I cut and coloured one extra umbrella and added that the bottom right hand corner with liquid glue.  I didn't add a sentiment as I thought I could use this card for multiple occasions and will add one later.  A fairly simple layout and limited supplies but it turned out quite cute I think.

I would like to enter my card into the following challenges: 

Addicted to CAS challenge - rain
Addicted to Stamps & More challenge - die cuts and/or stencil
A Place To Start challenge - ATG optional twist add 1 or more flowers
Aud Sentiments challenge - watercolour and/or spring + sentiment (certainly been lots of rain this spring)
Creative Inspirations challenge - the season of spring
I Love Promarkers challenge - ATG option add a button
Incy Wincy Designs challenge - inspired by a movie/song/book and/or sketch - 'singing in the rain'
Simon Says Stamp Monday challenge - whatever the weather
Passion for Markers challenge - monochrome (entering for fun!)

I would love it if you would pop over to Instagram and see the amazing work by all the other crafters taking part in the hop.  Please use the hashtag #2024springintocardmakinghop to find us and also so that we can find your creation if you are inspired to take part.  

I'll be back again with you tomorrow with my card for the Krafty Chicks challenge so please pop by and check it out.  As always I appreciate the comments you leave and thank you so much for stopping by. 

Love and hugs, 

card ingredients:
Clearly Besotted Stamps - April showers stamp & die (magazine freebie from 2020)
Promarkers
Limetree Crafts - 250gsm smooth white card
patterned paper from scraps bin
Versafine - onyx black ink
Scalloped rectangle dies from de-stash page - unbranded

Monday, 1 April 2024

AAA Birthday challenge - shaker

Good morning lovely friends and welcome to April. I am so ready for the brighter, warmer days after all the rain we've had in South Wales over the winter. Let's hope it works out that way. I am back this morning for the start of a brand new challenge over at the AAA Birthday challenge. This month Swapna is our hostess and she has chosen 'shaker' as our theme. Our lovely guest for this month is Deborah Frings so pop over and leave her some love.
I haven't made a shaker card in a little while so it was a nice change to make one.  I didn't have anyone in mind when I made my card so had free rein with what I could do.  I decided to make a shaped shaker card.  
Here's my shaker card:
a closer look:
I decorated the inside too:
I began by using a coffee cup card die to cut out the basic card shape.  When I used this die last time I must have cut some pink frames and not used them as I found them in the packaging so decided to use them up this time.  I cut another 4 white frames and adhered them all together with liquid glue so I had a really sturdy frame to work with.  I cut some acetate with the coffee cup die and adhered it behind the frame with liquid glue.  I also discovered a background that I made last year (I think using Tonic shimmer powders) which was lovely and shimmery and had some pink in it so thought why no use it up too.  I cup the coffee lid and also the backing for my shaker from this shimmery card.  I added foam strips behind the frame, added some silver sequins to the cup and stuck it all together.  I added a double thickness of foam tape behind the lid to make it as dimensional as the frame and adhered it to the cup.  For the sleeve I wanted a sentiment that was a little punny but couldn't find anything suitable in my stash so made my own.  I stamped the 'happy birthday to' and then die cut some letters 4 times from pink card to spell the word BREW (I know technically brew is synonymous with tea but I think it works in this instance) and lightly ink blended them to give them a slight ombre look and added them to the sleeve with liquid glue.  I stamped a row of cocoa beans underneath to continue the coffee theme and ink blended around the whole sleeve in brown ink (I did try pink first but didn't like it so went over it with the brown).  The sleeve was added to the frame with liquid glue.  The front definitely didn't need anything else with all the sparkle and shimmer going on.  For the inside I used one of the inner parts that cut out when I die cut the frames, added a thin piece of the shimmery card to the bottom and again added a punny sentiment with black ink and a single cocoa bean.  A really fun card and I'm super happy with it.  I may decide to add a gift card holder on the inside depending on who I give it to.  

I would like to enter my card into the following challenges:

Cut It Up challenge - happy birthday
Get Creative challenge - April Fool's Day (joke or punny sentiment)
If You Give A Crafter A Cookie challenge - the sprinkles made me think of a shaker 
Snippets Playground challenge - I used all pieces from my scrap bin/already die cut 
Sweet Stampin' challenge - birthday girls (Happy Birthday to Wendy)

The Design Team have created amazing cards as always so please pop over to the blog and check them out and perhaps leave them some love on their personal blogs.   

I hope you will be able to join in with our challenge this month but don't forget it has to be birthday themed.  I can't wait to see your creations in the linky.

Enjoy the rest of your day and thank you so much for stopping by.

Love and hugs, 

Card ingredients:
Honey Bee Stamps - coffee cup card honey cuts
Honey Bee Stamps - perfect blend stamp set (for inside greeting & cocoa beans)
MFT - make a wish stamp set (for the partial outside greeting)
MFT - little letters die-namics
Taylored Expressions - foam sticky strips (for shaker)
Gina K Designs - ink pads - warm cocoa, bubblegum pink
acetate from packaging
pink card from stash
Pretty Pink Posh - sparkling clear sequin mix
Tonic Nuvo Shimmer powders (not 100% sure what colours I used but they are all beautiful)