My Lovely Followers

Showing posts with label Gansai Tambi. Show all posts

Thursday, 12 November 2026

Stencil Fun IG Hop - November 26

Hello friends; I here to share my card for the Stencil Fun IG Hop organised by my lovely friend Jane. We are a group of crafters who are determined to use their forgotten and neglected stencils. I'm definitely guilty of this; I have so many stencils but usually forget to reach for them so this hop is perfect for me. The theme is always anything goes but we will have an optional theme to use if we want to. This month's optional theme is 'trees' and I'm sure there will be lots of fantastic creations. I'm excited to see what everyone has made.
I recently picked up an older tree stencil from MFT on sale without even thinking about this hop so I was pleasantly surprised when I realised I could use it for this month's card.  I used a couple of cute images to go with it and I think it turned out adorable.  I hope you like it too. 
Here is my card:
A closer look at the details:
Another view to try and show the gold & white spatter:
Plus I decorated the inside:
I began by cutting a white panel 4" x 5 1/4" and using three different shades of green ink I ink blended the tree stencil.  Whilst the stencil was still in place I added gold and white spatters for some extra interest.  I stamped the images onto alcohol marker friendly card, coloured them with Promarkers and added some white gelly roll pen highlights.  I don't have the dies so I fussy cut them out.  I white heat embossed the sentiment onto black card and used a fishtail banner die to cut it out. I added the images and sentiment with foam squares onto the background and finished off with some faux enamel dots (circles die cut from red card covered with packing tape) that were left over from another project.  The panel was then adhered to my card base using double sided tape.  For the inside I cut another white panel and ink blended onto the bottom third using whatever green ink was left on my brush; I also added some gold and white spatter here too.  I stamped the sentiment in the centre with black ink and added the panel onto my card base using double sided tape.  

I would like to enter my card into the following challenges:

* to be updated *

We hope you will be inspired by our Stencil Fun Instagram Hop and will pop over and check out all the gorgeous cards along the way. If you would like to join us please visit my Instagram page or use the hashtag #stencilfunnov2026 and we will find you. 

Thanks for stopping by.  I'll be sharing another card with you on Saturday and I'd love for you to pop back and check it out if you can.   

Lots of love, 

card supplies:
MFT - Christmas cheer stamp
MFT - blueprints 27 (for fishtail banner die)
Gina K Designs - ink pads - key lime, jelly bean green, fresh asparagus
Gina K Designs - white pigment ink cube (I use this when embossing with white)
Gina K Designs - lots of dots die set (for my faux enamel dots)
Kuretake - gansai tambi starry colours palette (for gold spatters)
Winsor & Newton - white gouache (for white spatters)
Limetree Craft - 280gsm silky smooth white card (not available but other options are here and here)
Versafine Clair - nocturne ink pad
Heffy Doodle - alcohol marker friendly card

I now have Affiliate Links for the Gina K Designs store. If you are considering making a purchase I would appreciate you using my links as it will earn me a small commission at no extra cost to you. 
Thank you x

Wednesday, 29 November 2023

Winter Wonderland IG Hop - Week 5

Hello friends and happy hump day.  I hope you've had a great day so far.  It's Wednesday so it's time for this week's instalment of the Winter Wonderland IG Hop organised by my lovely friend Kelly.  This is technically the last week of the hop but don't worry as we have an extra bonus week for you next week!  Each Wednesday we are sharing our creations with a winter theme. 
This week is Week 5 and our theme is plaid poinsettia.  Now the brief was you can make something that includes a poinsettia or include some plaid or both.  I decided to use both.  Here is my card:
A close up of my poinsettia:
I decorated the inside as usual:
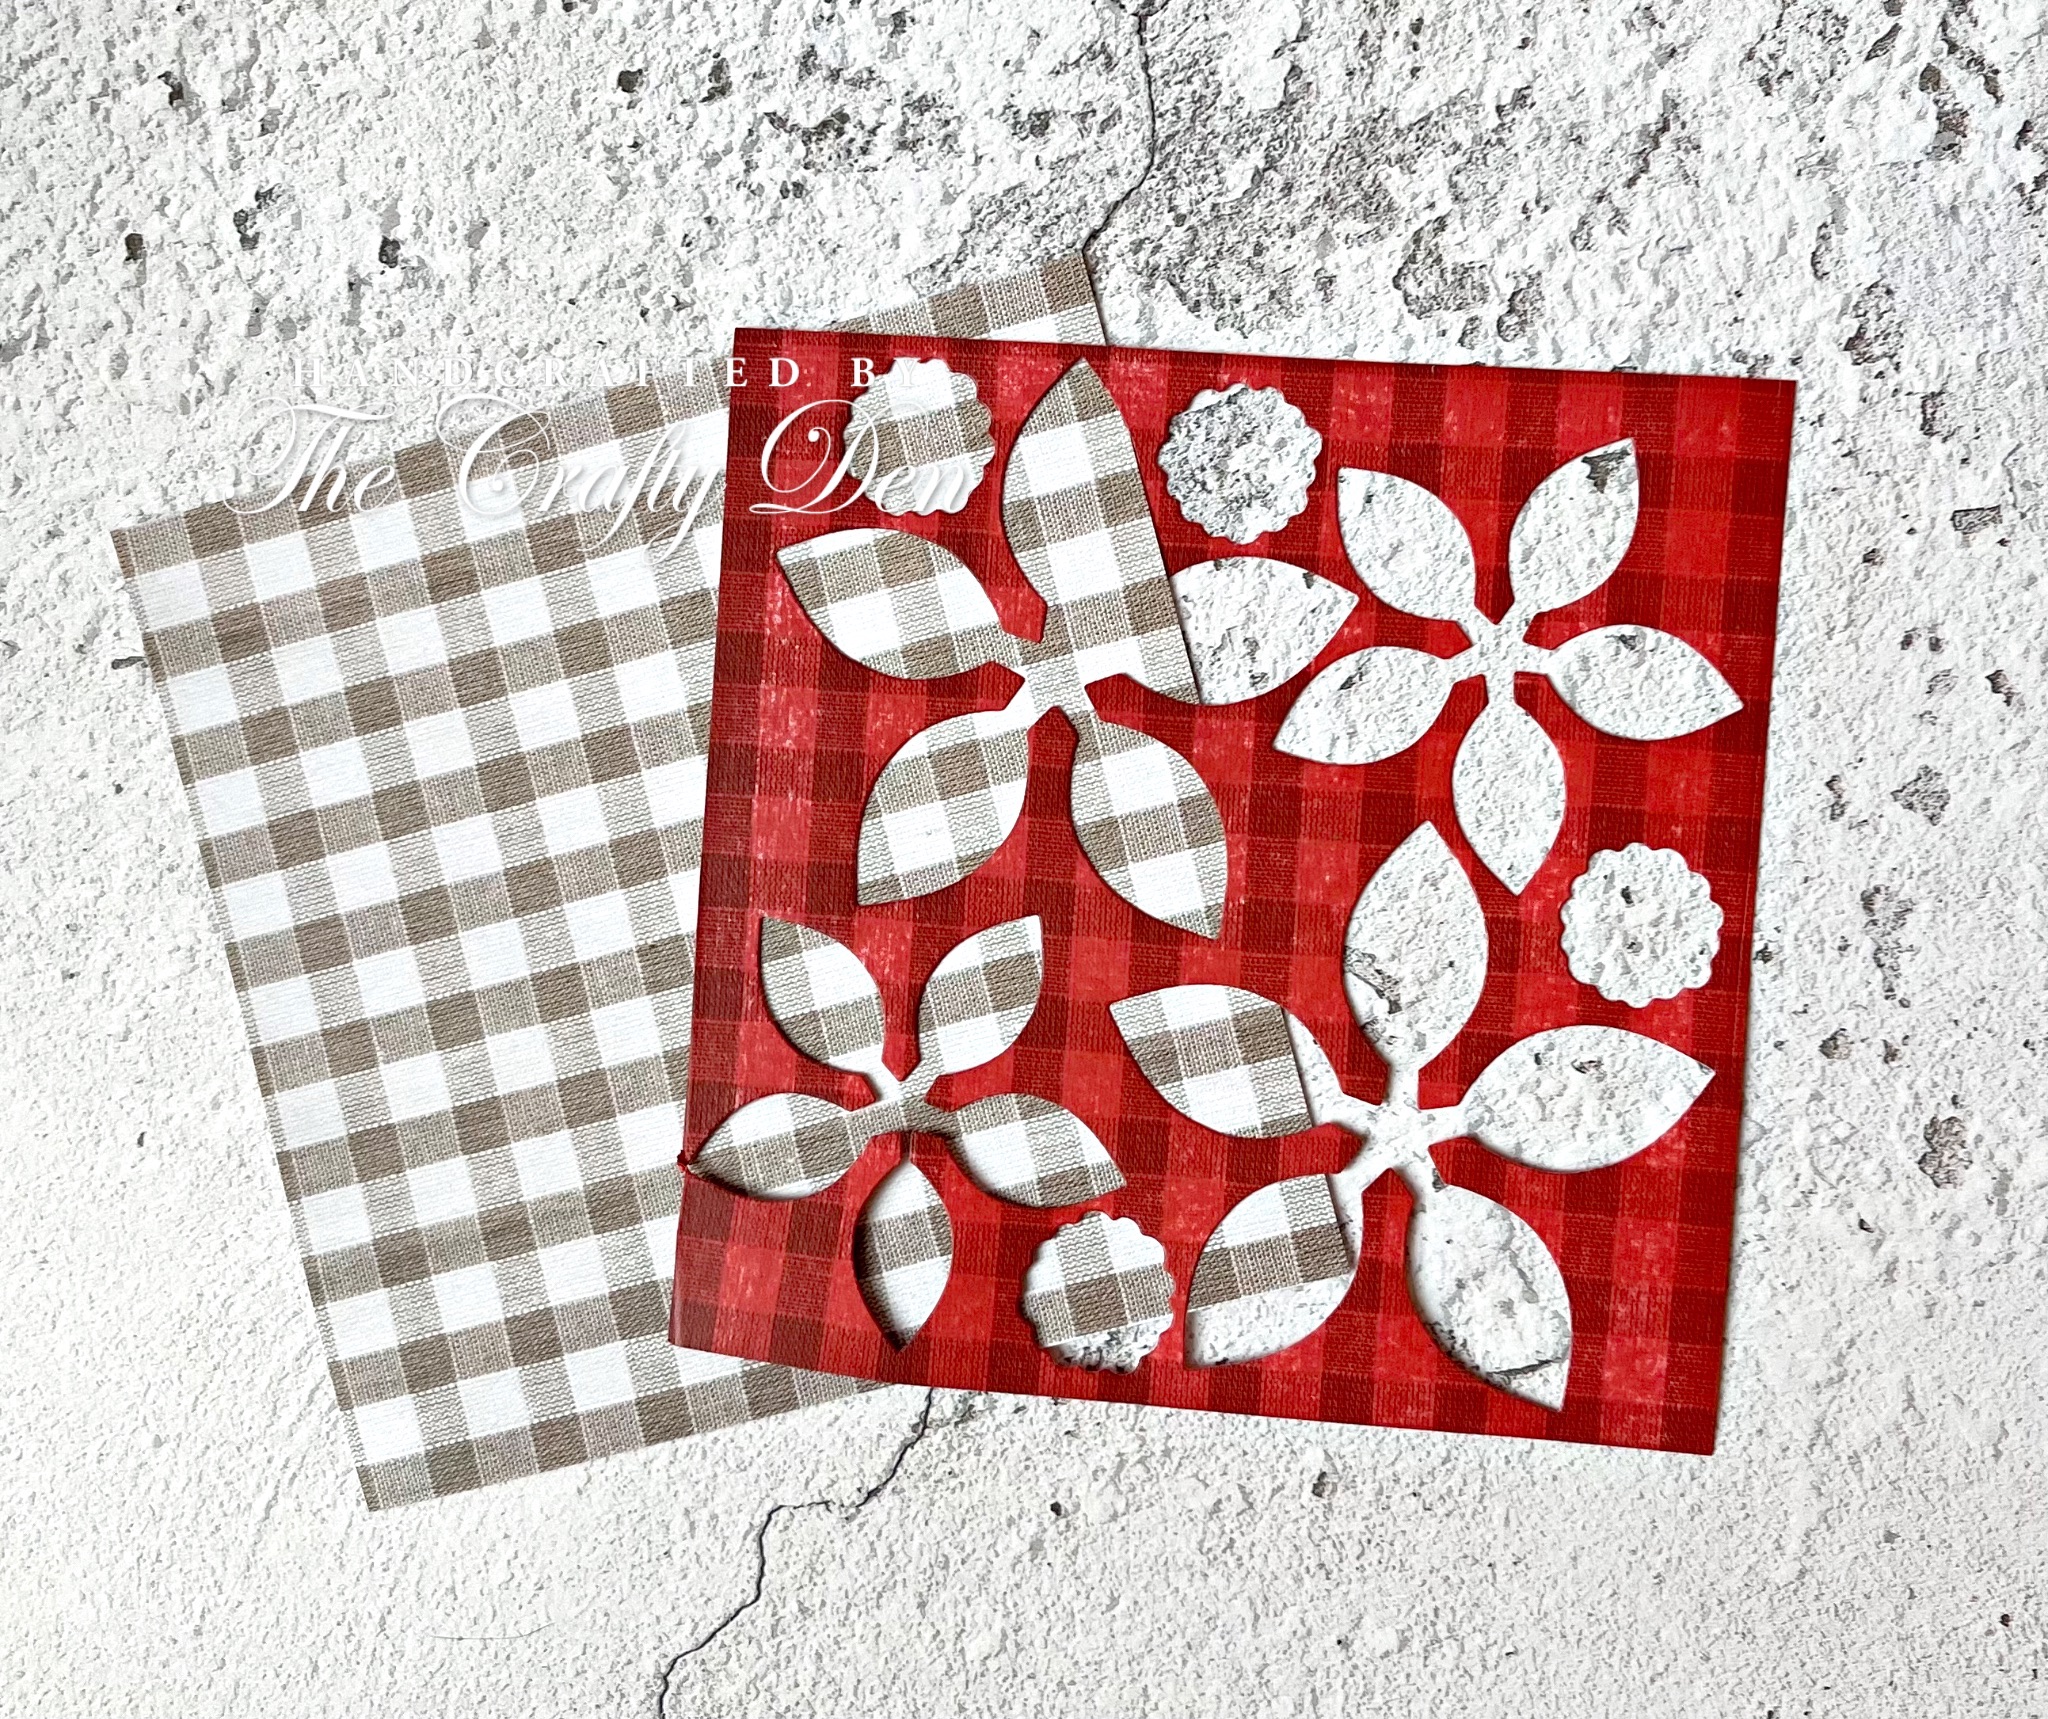
here is what the paper looked before and after inking:
I began by trying to find some plaid patterned paper, which was not easy.  I eventually found one but it was a beige/neutral colour.  I decided to ink swipe onto the paper with a red ink pad to make it the colour I wanted.  I think it turned out really good and just what I was looking for.  I then die cut my poinsettia; one large layer and 2 smaller layers, plus a few leaves from dark green card and the centre from gold mirri card; I then added gold pearls onto the centre.  I used foam squares to attach all the layers so it ended up being very dimensional.  I cut a piece of white card to a 3 3/4" x 5" panel and added a strip of red spotted paper and a smaller strip of the gold mirri card to the left hand side.  I adhered the leaves with liquid glue and stamped my sentiment in black ink.  I then added the poinsettia with liquid glue over the leaves.  For a final touch I added some gold splatter over the entire card panel.  The panel was then attached to my A2 card base with double sided tape.  For the inside I added another strip of spotty paper and gold mirri card and as I had one poinsettia left over I cut it up and layered it into the bottom left corner.  I stamped a sentiment in black ink.  A really dimensional and shimmery card in real life and I'm really happy with it.  

I would like to enter my card into the following challenges:

Crafty Gals Corner challenge - dots and/or stripes
Double D challenge - stripes and/or dots
Inkspirational challenge - seasonal (obviously I've gone for Christmas again)
Time Out challenge - winter/holiday
Try It On challenge - traditional Christmas
Use Your Stuff challenge - shine bright (mirri card, gold pearls, gold splatter)

We hope you will be able to join us over on Instagram and follow the hop.  Please use the hashtag #winterwonderlandcardhop2023 to find all of our creations and we will be able to find yours if you feel inspired to join in.  

Enjoy the rest of your day and thank you so much for stopping by.  

Love and hugs, 
  
card ingredients:
MFT - all star high top die-namics
Gina K Designs - red hot ink pad
Personal Impressions - big Christmas essentials (for outside sentiment)
Personal Impressions (Paula Pascual) - Christmas messages (for inside sentiment)
Limetree Crafts - 250gsm smooth white card
Echo Park - dots & stripes (Valentine) for spotty paper
Gansai Tambi - starry colours palette (for gold splatter)
green card & mirri card from scrap box

Saturday, 8 July 2023

Summer Crush Wednesday Week 4

Hello and happy Saturday friends.  Apologies that this post is late this week; we went away at the beginning of the week for a couple of days to celebrate our 30th Wedding Anniversary and I've been playing catch up ever since!  Welcome to Week 4 of the Summer Crush Wednesday IG hop organised by my good friend Kelly.  The hop will run for 6 weeks (this is week 4) and we will have some fun themes and even some techniques I've never tried before!  If you would like to join us just use the hashtag #scwcardhop23 and we will find you (you can also see all the other participants of the hop using this hashtag).  This week is 'salt life' and this is a technique I've never tried before; water-colouring and using salt to create interesting and original backgrounds.  I hope you will give it a go as it's really fun.  


Here is my 'salt life' card:


here are some close ups of the salt effects:


and I had a small piece left so decorated the inside too:


I began by water-colouring my panel with my paints using pinks and purples.  I watched a tutorial on YouTube so that I knew what the process was when using salt and apparently the secret is that the paint has to be almost dry for the effect of the salt to be more dramatic.  I was pressed for time so blasted my background with a heat tool until almost dry and then sprinkled some regular table salt and some salt crystals onto my background.  Ideally I think you would leave it for quite a few hours or even overnight to react with the paint but again I was strapped for time so left it for 2 hours and then again blasted it with heat to make sure it was completely dry.  I then rubbed off the salt to reveal the reaction.  I was pleasantly surprised with the result and it looked really good.  I didn't want to cover up my background too much so decided to make a slimline card (which I don't do very often).  I die cut some flowers and a butterfly from black card and adhered them with liquid glue onto the water-coloured background.  The sentiment was a pre-made strip and I added that with foam squares.  A very simple card but I think it looks dramatic and perfect for a sympathy card.  I'm looking forward to creating more salt backgrounds in different colours.  

I would like to enter my card into the following challenges:

Creative Knockouts challenge - finish the inside
Unicorn challenge - no design paper

Please pop over to Instagram to see what the other participants of the hop have created; we cannot wait to see what you create.  Don't forget to stop by again next week for more summer fun creating.  

Have a great weekend and thanks for stopping by.  

Love and hugs, 


Card ingredients:

Sizzix/Tim Holtz - wildflowers #1 thinlits
Clearly Besotted - butterfly duo die collection (retired)
Gina K Designs - sentiment strips dies
Gina K Designs - so many sentiments (for inside sentiment)


Thursday, 1 June 2023

AAA Birthday challenge - DT card

Good morning lovely friends and happy 1st of June.  I can't believe we are already in the 6th month of 2023 - where has the time gone?  

I am here today with my DT card for this month's AAA Birthday challenge.  This month our hostess is Deekshita and she has chosen 'water colours'.   The challenge lasts from 1st June - 30th June and it is for birthday cards only.  


I started my card with a completely different plan in my mind but I changed it after finishing my water colour background; the final result is not what I envisaged but I think it turned out ok.  


here is a closer look:


As I say I began by water colouring the background using my Gamsai Tambi water colours.  I was originally going to add a little critter image over the top but I didn't like it so searched through my stamps and found this beautiful Gina K Designs stamp which fit the shape I'd created perfectly.  I did use some clean water and 'bleached' out the flowers a little so that there would be some colour difference from the background.  I haven't made a circle card for such a long time and I thought it would be perfect for the wreath shape.  I used an old Go Kreate XXL circle die set but had to trim the black circle as the size difference was too big but don't look too closely as my border is a little wonky in places lol!  I finished off by adding a scripty sentiment and some black pearls.  The card base was created with the same larger circle dies and I added some extra interest with an embossing folder.  The finished card is 5 3/4" diameter.  

I would like to enter my card into the following challenges:

SSS Wednesday challenge - anything goes
Happy Little Stampers Watercolour challenge - ATG (option bright colours)
Can you handle the pressure challenge - ATG (option bird/birdhouses)
Allsorts challenge - anything goes (option use a stencil)

I hope you will have a chance to join in with our challenge this month.  Please pop over to the blog for all the details and to check out the wonderful creations from the rest of the DT.  We also have Ana as our guest designer this month.  

I cannot wait to see your amazing creations. 

Thanks for stopping by.

Crafty hugs and love, 


Card ingredients:


Gina K Designs - Kindness wreath stamp set (not sure if discontinued)
Gina K Designs - Spring floral BG stamp set (for sentiment)


Go Kreate XXL circle dies 
Gina K Designs - embellishment pearl mix
We R Memory Keepers sunburst EF (discontinued)


Saturday, 1 April 2023

Guest Designer - AAA birthday challenge

Good morning lovely friends.  I am delighted and honoured to be a guest designer over at the AAA Birthday challenge blog this month.  


The theme this month is 'layer it up' and here is my card:

 
close up of layers


I decided to go clean and simple with my layers and created a 30th birthday card for a friend using white with a hint of gold and black.  Firstly I cut a panel and scored some lines using my score board for a little interest in the background.  I then splattered some gold and black ink for some drama.  I die cut the leaves from Gina K Designs in white and vellum and the '30' numbers from My Favorite Things in gold.  I also die cut a decorate shape in vellum so that the numbers stood out a little from the leaves.  I assembled the leaves behind the vellum panel and added the numbers on top (I did add a small circle of white cardstock for stability).  The sentiment strip is a pre-made one from Gina K Designs.  Can you believe there is no stamping on this card - shock I know!  The finished card is 5 x 7 inches.  

I hope you will have a chance to enter the challenge, but remember it is a birthday card only challenge.  You can find all the details here.  


Thanks for stopping by.

Crafty Hugs,


Card ingredients:

White cardstock - Heffy Doodle
Black cardstock - Heffy Doodle oreo crunch
Foliage fillers - Gina K Designs
Mixed messages sentiment sheets - Gina K Designs
By the numbers - My Favorite Things (retired)
Gold pearlescent card - Tonic 'autumn maple' 6x6 pad (no longer on the Tonic site)
Vellum - Stampin' Up card stock vellum that's been in my stash for years!

Saturday, 24 April 2021

Beautiful wildflowers

Happy Saturday friends.  It's a beautiful day here is South Wales, glorious sunshine all day but very breezy (perfect for drying my washing lol!).   I hope you're having a fab day and the weather is good where you are too.  I'm sharing a slimline card I made for a friend in work who's birthday is today.  Apart from the sentiment there is no stamping on this card.  Here is my card:


close up of the card:


pretty gold embossing & splatters:


I die cut the flowers from white card and coloured them with oxide inks for a softer effect.  I die cut the butterfly from glitter card and black for the body.  I created the background by simply splattering some gold pigment paint in 2 shades of gold for a sparkly but clean and simple look.  I added the panel to a peach coloured card panel and then adhered this to my white card base.  The sentiment was embossed in gold embossing powder and I added a few pearls for a final touch.  The finished card size is 4" x 8 1/4".  I don't make slimline cards very often but I really like them so I will have make more of them soon.  

I would like to enter my card into the following challenges:

Creative Knockouts challenge - wings and things
Simon Says Stamp Monday challenge - bright, cheerful colours
Allsorts challenge - use 3 colours of the rainbow (red, orange, green)
Krafty Chicks challenge - all occasions

Enjoy the rest of the weekend and I'll catch you back here very soon.

Hugs, 


Card ingredients:

Sizzix/Tim Holtz Thinlets - wildflowers
Distress Oxide inks in abandoned coral, spiced marmalade, mustard seed, twisted citron
Memory Box - pippi butterfly
Gansai Tambi - starry colors (I used yellow gold and red gold for the background)
Ranger - letter-it birthday (for the sentiment)
pearls from Little Things from Lucy's cards (they were a free gift)
peach cardstock from stash